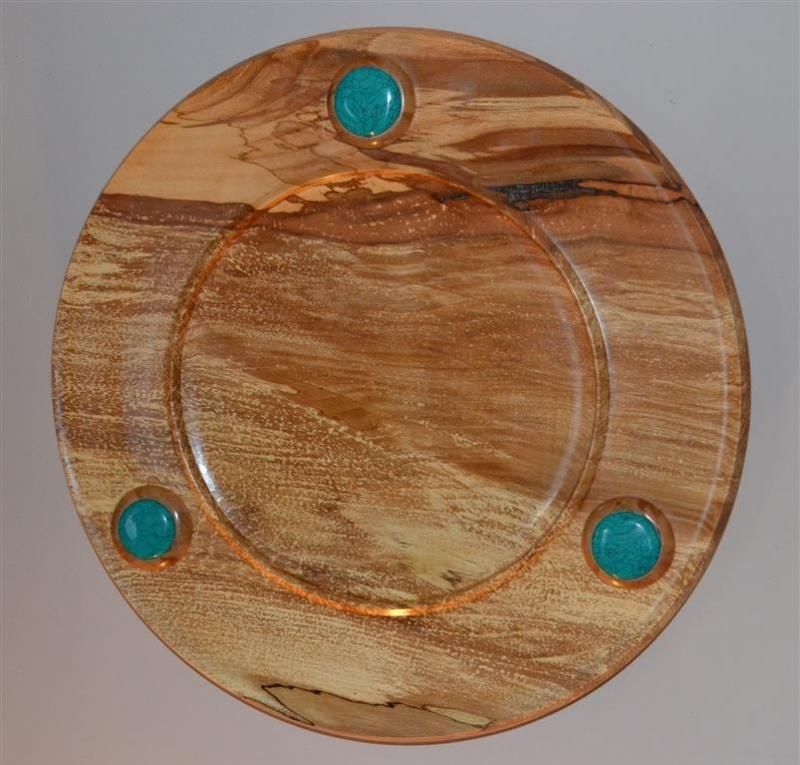
This platter has been turned from a 20" x 2" beech blank which had been cut and seasoned several years ago and which I found among a large batch of blanks that I bought recently. The finishing process involed sanding, starting at 120 grit, then up to 600 grit, all done using Abranet abrasive mesh. The surface has been brush-painted with 3 coats of Danish Oil, then cut back with 600 grit abrasive, buffed and waxed using a micro-crystaline, water resistant wax, then buffed again using 8" buffing wheels on my lathe.
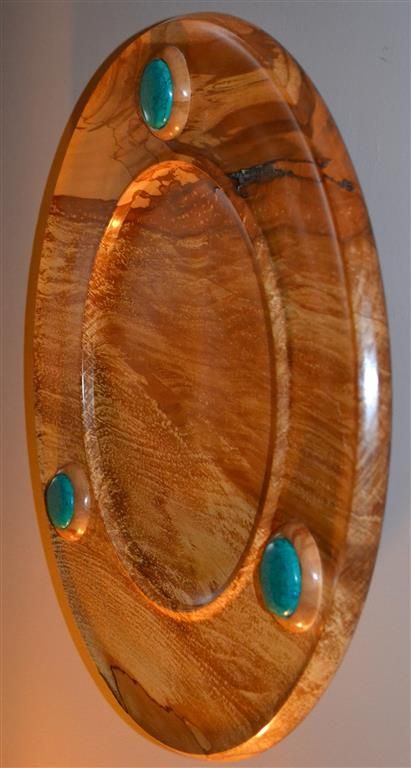
I set out to design and make a platter in the general style of the Arts and Crafts movement of the late 19th Century, in which traditional skills and a romantic sense of decoration were frequently used. My original design involved pyro-etching a border onto the rim of the platter, with four Lapis Lazuli polished gem-stones set into the design. However, once the platter was turned I had a change of opinion about the suitability of the design for this particular piece of timber. The grain was more heavily spalted than I had thought that it would be, which posed two problems. Firstly, it seemed a shame to cover up much of the spalting with pyro-engraving, and secondly, the result might well have been too 'fussy' and over decorative for my original intention. I took a few days to decide what to do next, then remounted the platter on the lathe, using the chuck-socket that I had cut into the underside, but in those few days the platter had warped considerably and was now more than a quarter of an inch off being flat, so next, I placed the platter on a flat surface in the house, with a series of weights on top of it, and left it there for a couple of months, after which it had returned to being quite flat, but had shrunk across its grain by three-eighths of an inch.
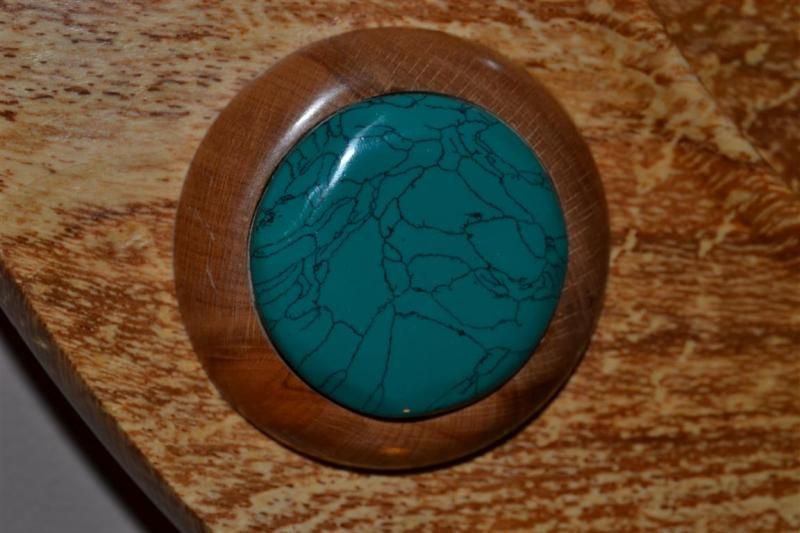
By this time I was confident that my decision not to go ahead with the pyro-engraving was justified and I also decided to set just three stones into the border, instead of four. To set the stones, I turned three cushion-mounts out of a piece of beech. Each mount had a tenon on the underside, 1.5 inches diameter, x 0.25 inches long and I then drilled corresponding recesses in the platter rim, using the indexing head on my lathe to mark out the positions.
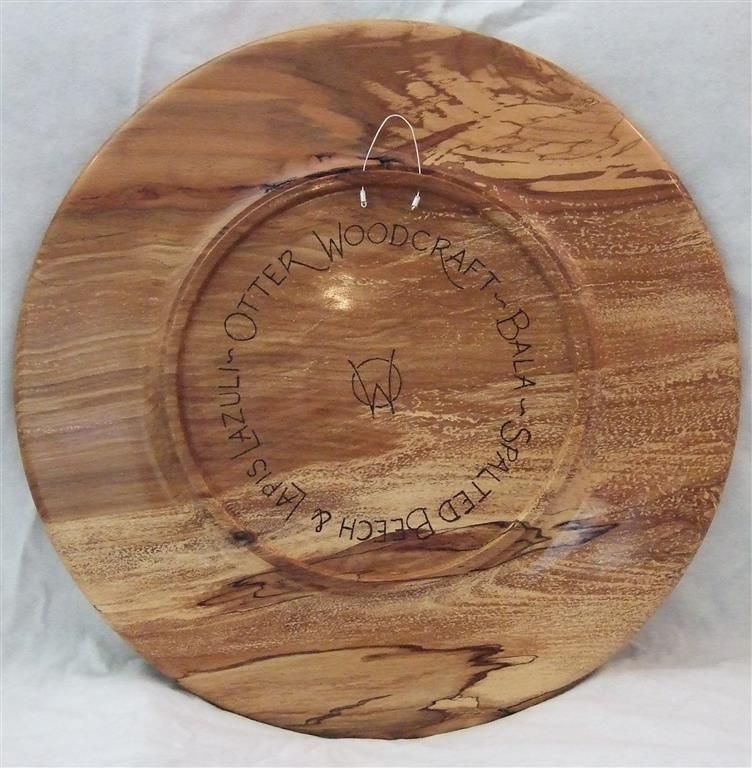
With the stones glued into place, I then attempted to reverse mount the platter to remove the chuck-socket. I normally do this on a large, plywood disc that I have made, using wooden buttons to hold my platters in place, but the shrinkage of the platter since it was first turned made this system a little unsafe, so I substituted the wooden buttons with a set of wooden cams that I turned, which allowed me to center the platter to within a very fine tolerance, then screw the cams down tightly, using 0.25" screws and wing-nuts. Thus the underside was skimmed, the chuck-socket removed and the surface marked out for the pyro-work involved in putting my name, timber species etc onto it. I have set a hanging-wire onto the underside, so that the platter can be wall-hung, but it can also be used as a platter, hence the choice of finish. The hanging-wire is made of solid silver wire, with silver crimp-ends to hold it in place. this has been drilled through a three-eighths" square 'foot' that I have turned into the underside.
C&C always welcome...Les


