
Natural Edge
Winner of February Competition
Roger Groom

Peter Hatherell
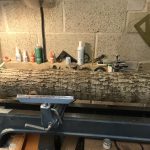
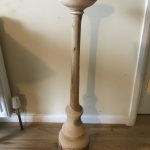
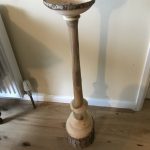
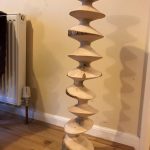
Earlier in the winter, a neighbour asked me to help him cut up some branches from a poplar tree (aspen) that had fallen onto a neighbouring field. I cut them into manageable lengths so we could move them easily, 3 to 4 feet long.
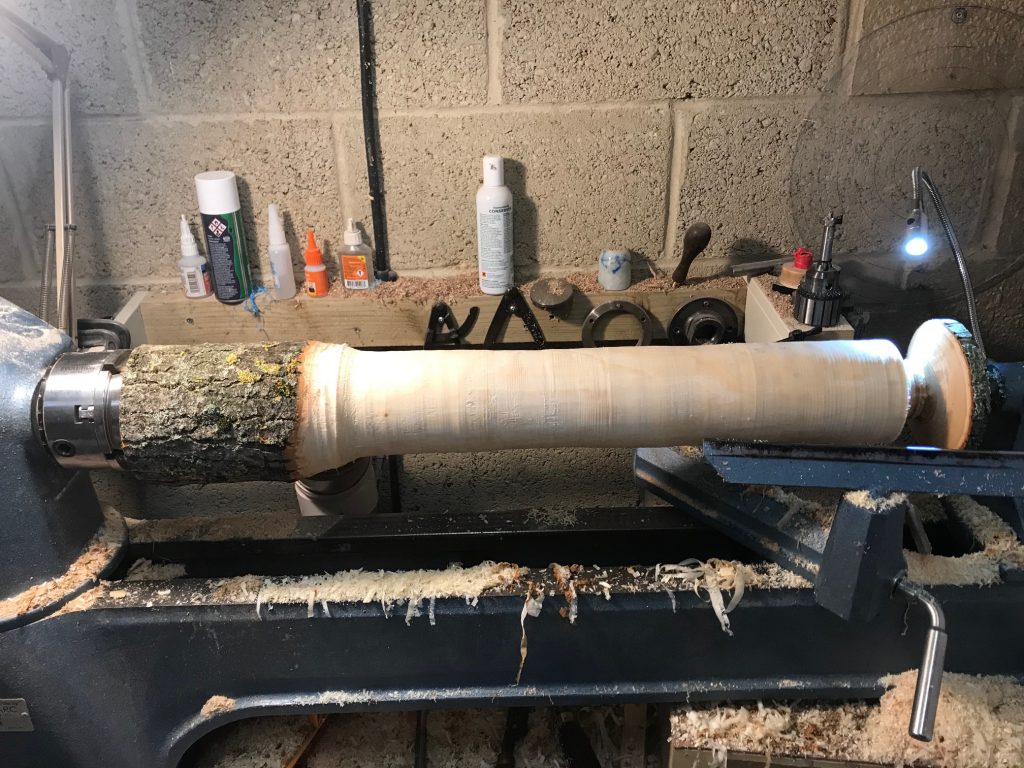
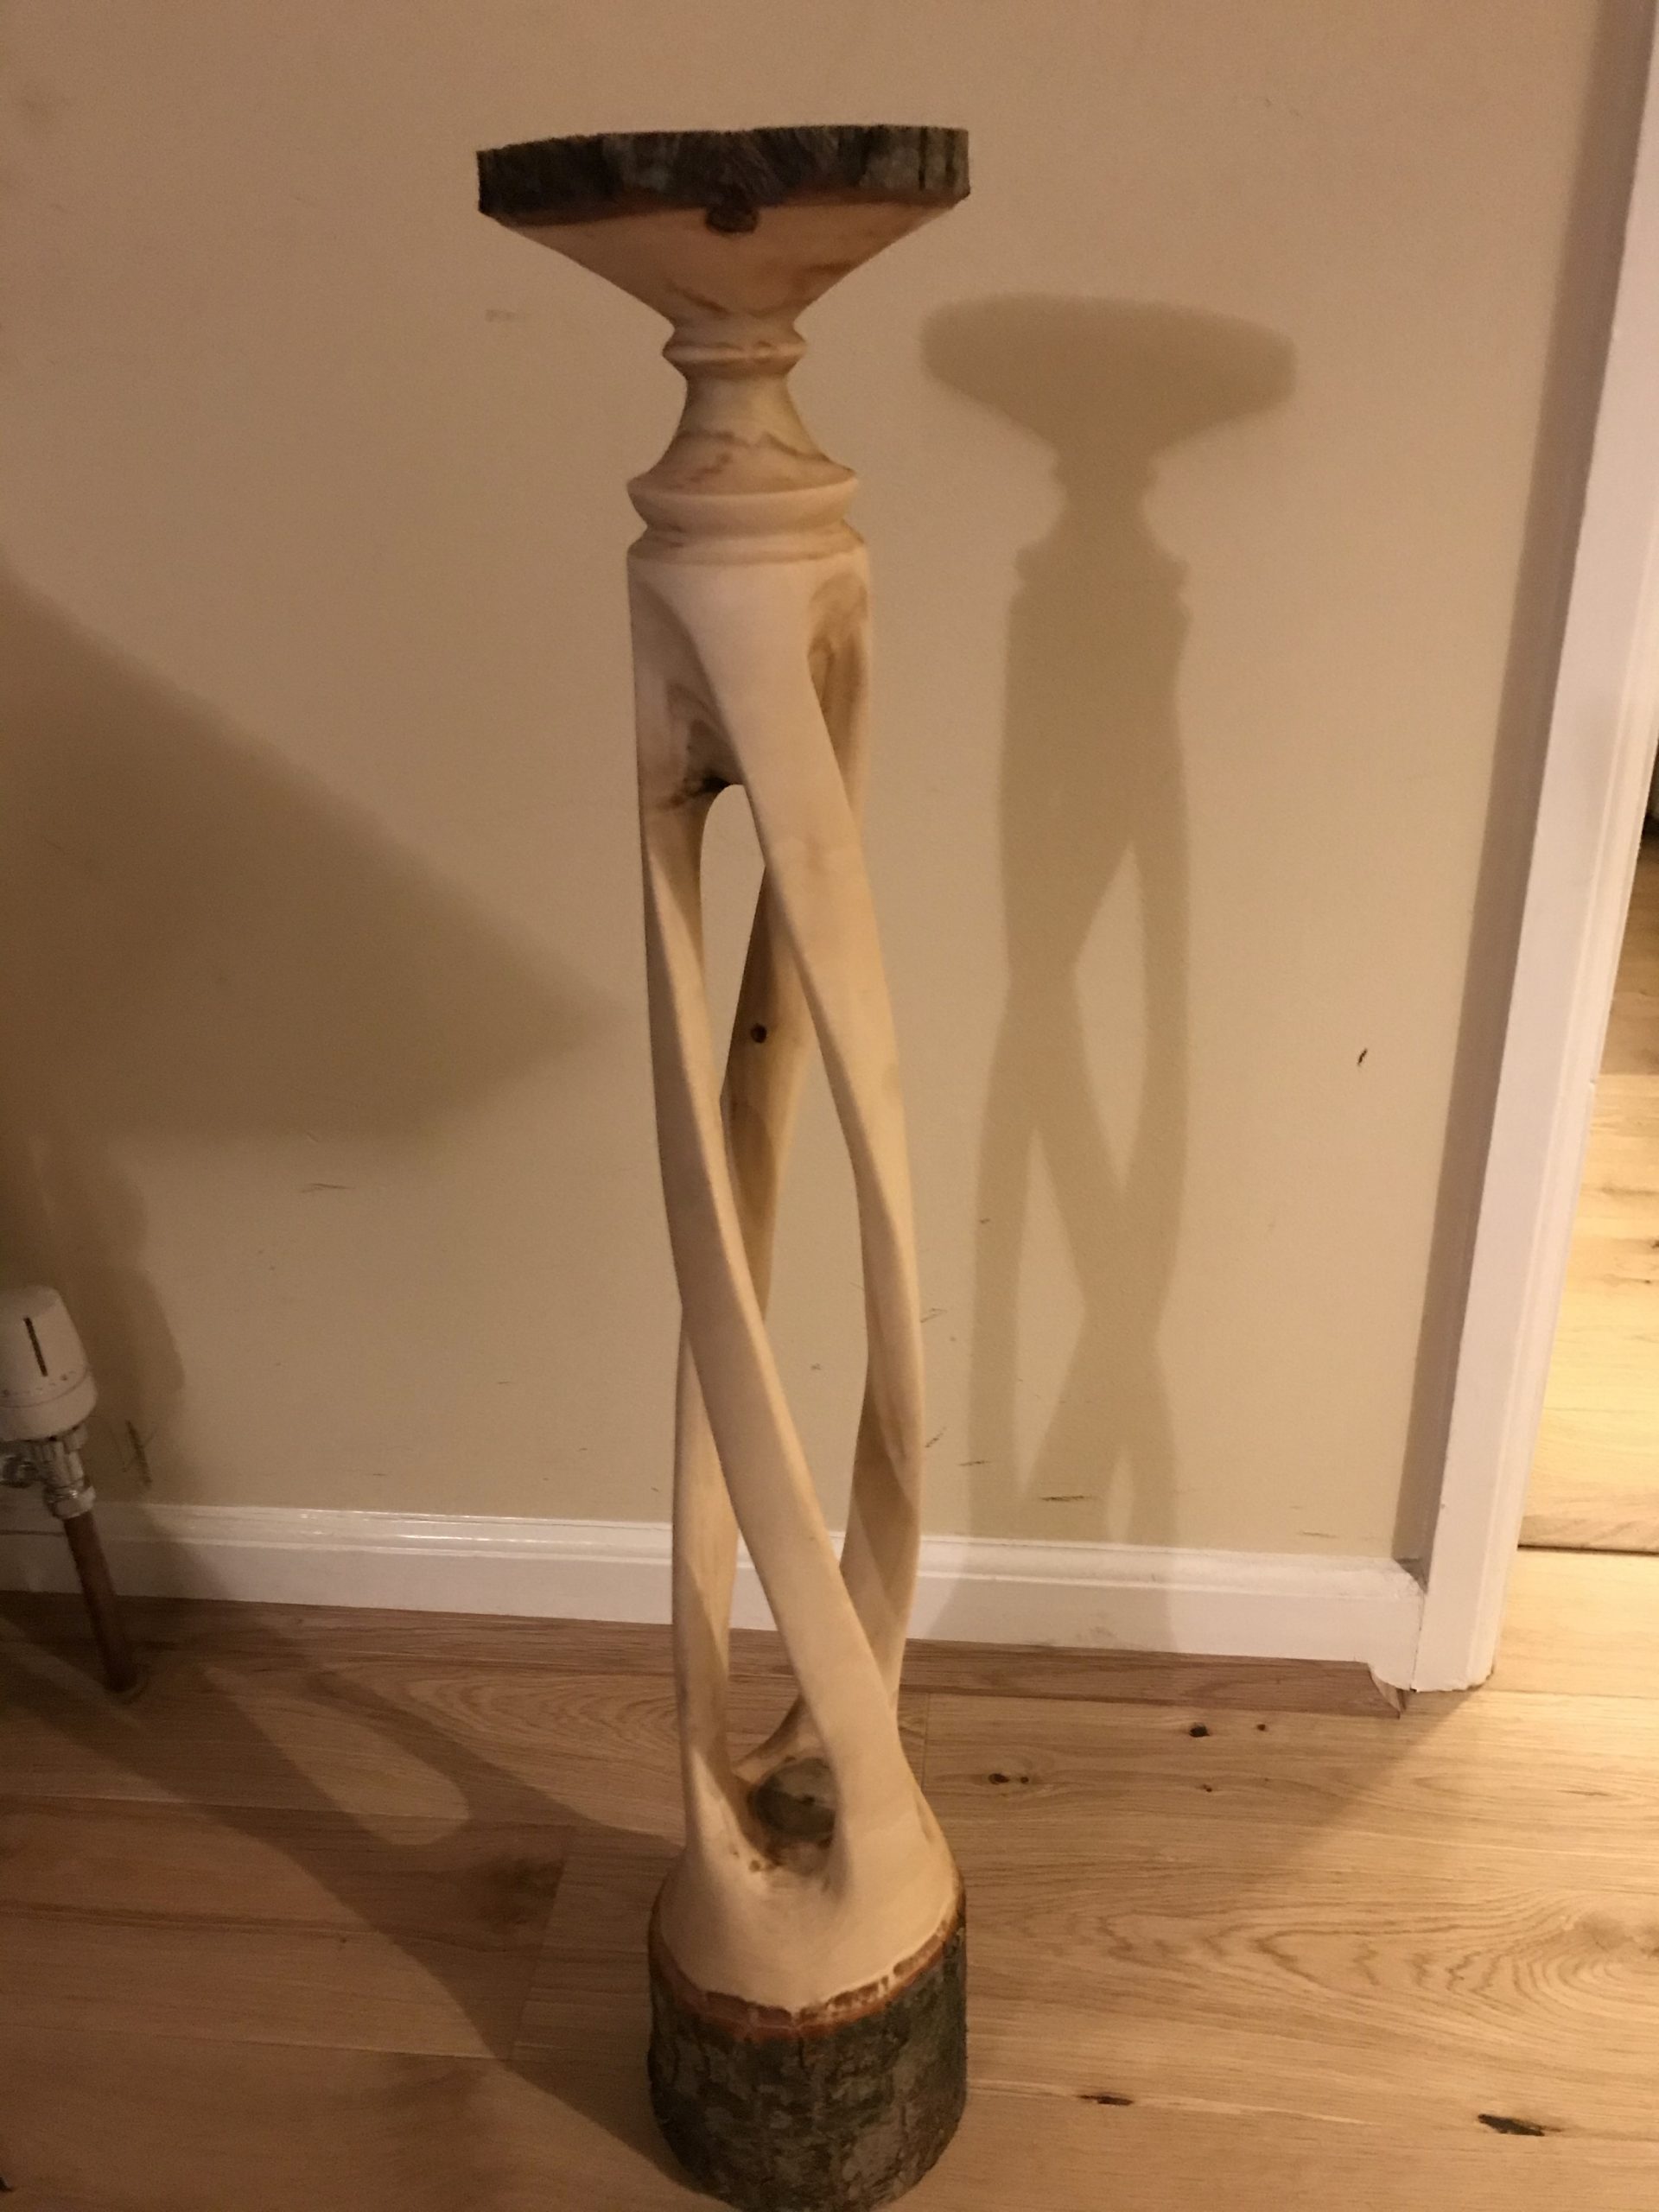
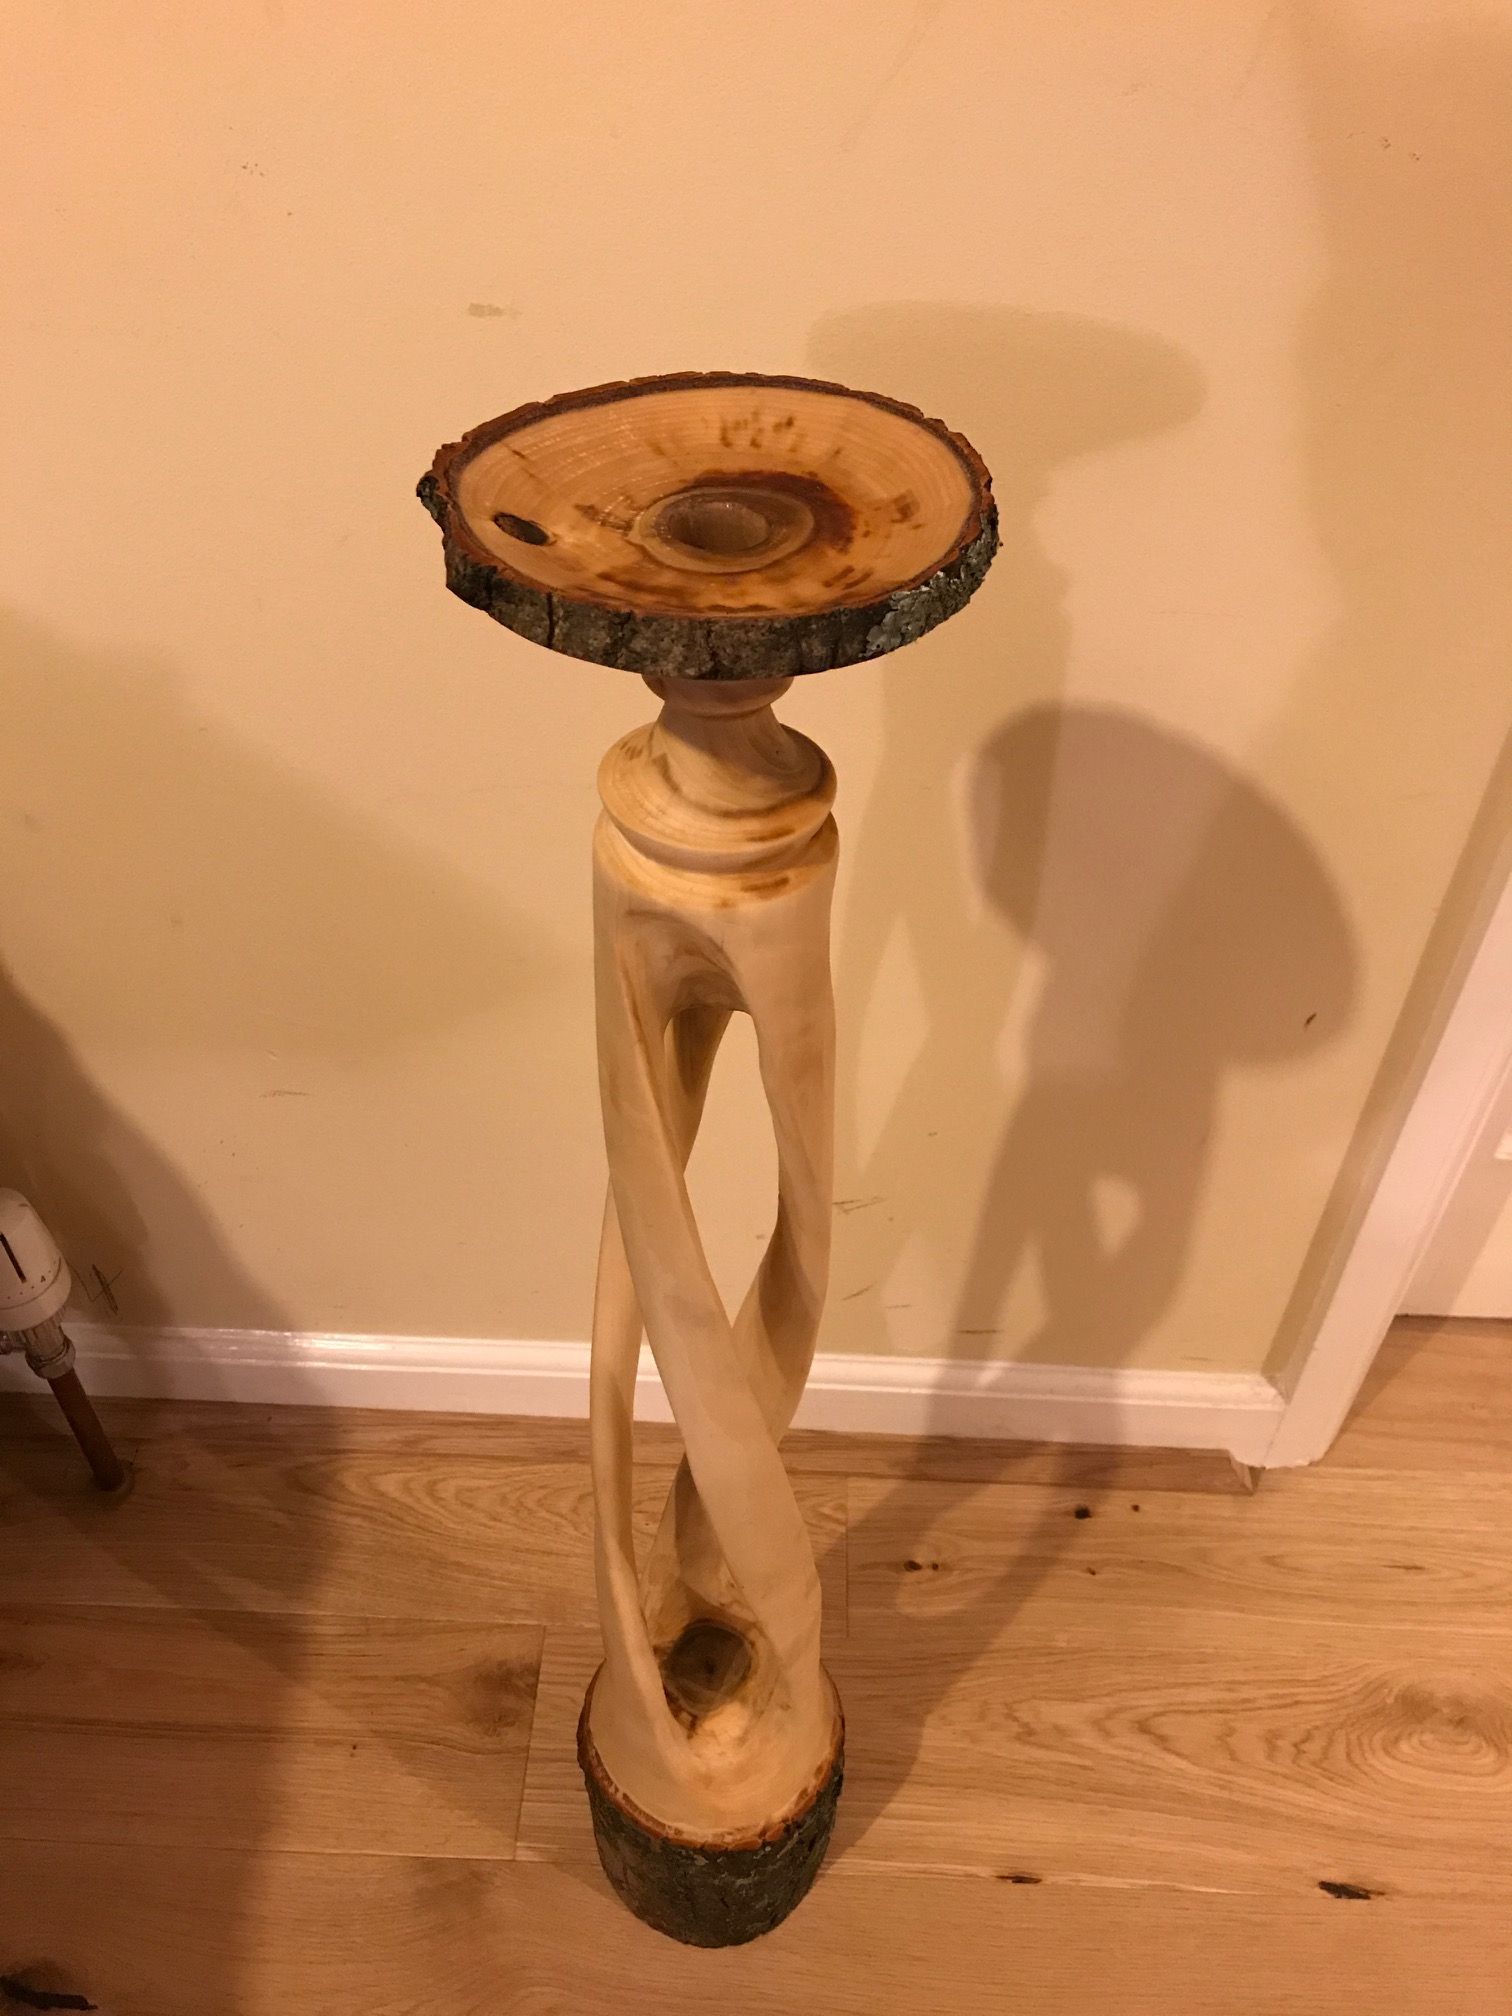
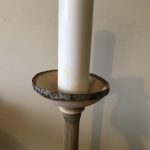
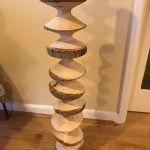
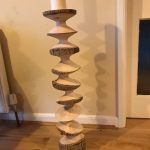
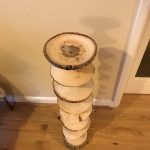
I have been wanting to turn some larger pieces so I thought I’d have a go with a couple of these branches. Starting with power files and sanders, followed by hand sanding, I shaped and finished the piece. The final height is 76cm and the diameter is about 14cm. My lathe will take up to about 1 metre so that determined the size.
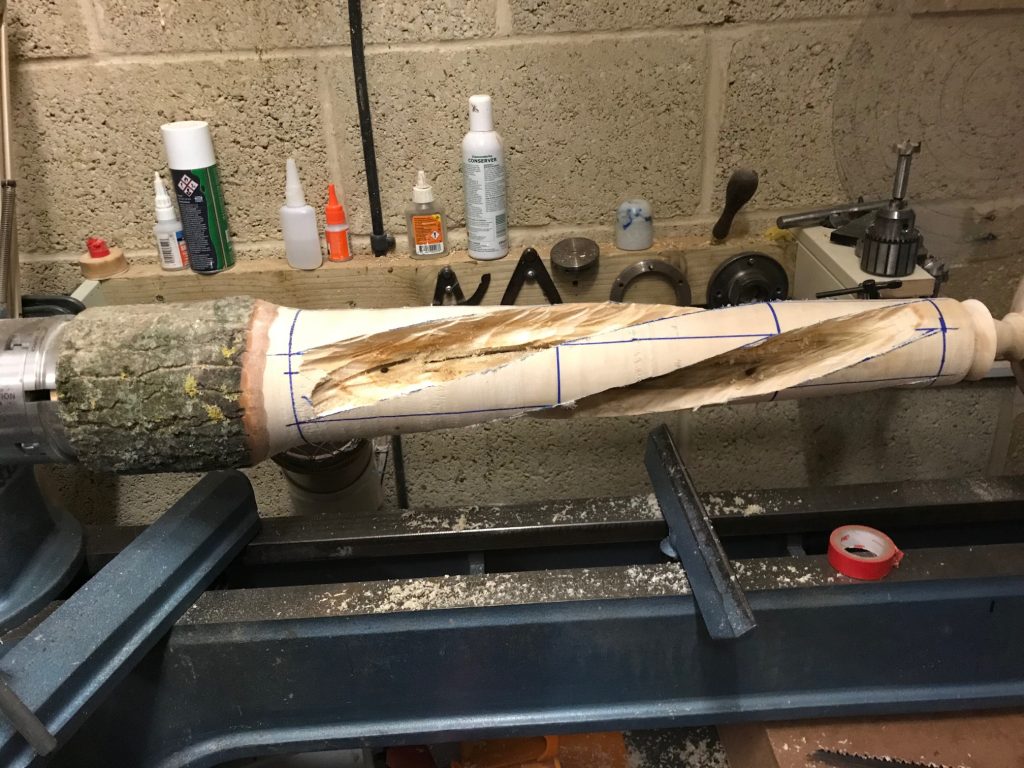
I mounted the log between centres and turned a tenon to go into my largest chuck jaws. After mounting on the chuck I turned the top, drilled a 22mm hole in the centre and reset the tailstock. I turned the middle section to an elongated conical shape then marked out for the spiral by dividing the circumference into six and the length into three sections to give a single turn – a three bine spiral. The rest was carving. I took a lot of the bulk away using a wood cutting disc on my angle grinder and drilled though along the length to reference where wood needed removing. The wood was very wet which meant that, while it was relatively easy to turn, it clogged up my rasps and abrasives. Therefore I left it for a couple of weeks in the cool workshop to dry a little, which it did quite quickly as it has a large area of exposed wood. Using a combination of surforms, rasps, power files and sanders, followed by hand sanding, I shaped and finished the piece. I wanted a rustic look so the finish is walnut oil only. The final height is 76 cm and the diameter is about 14 cm.

Dennis Wake
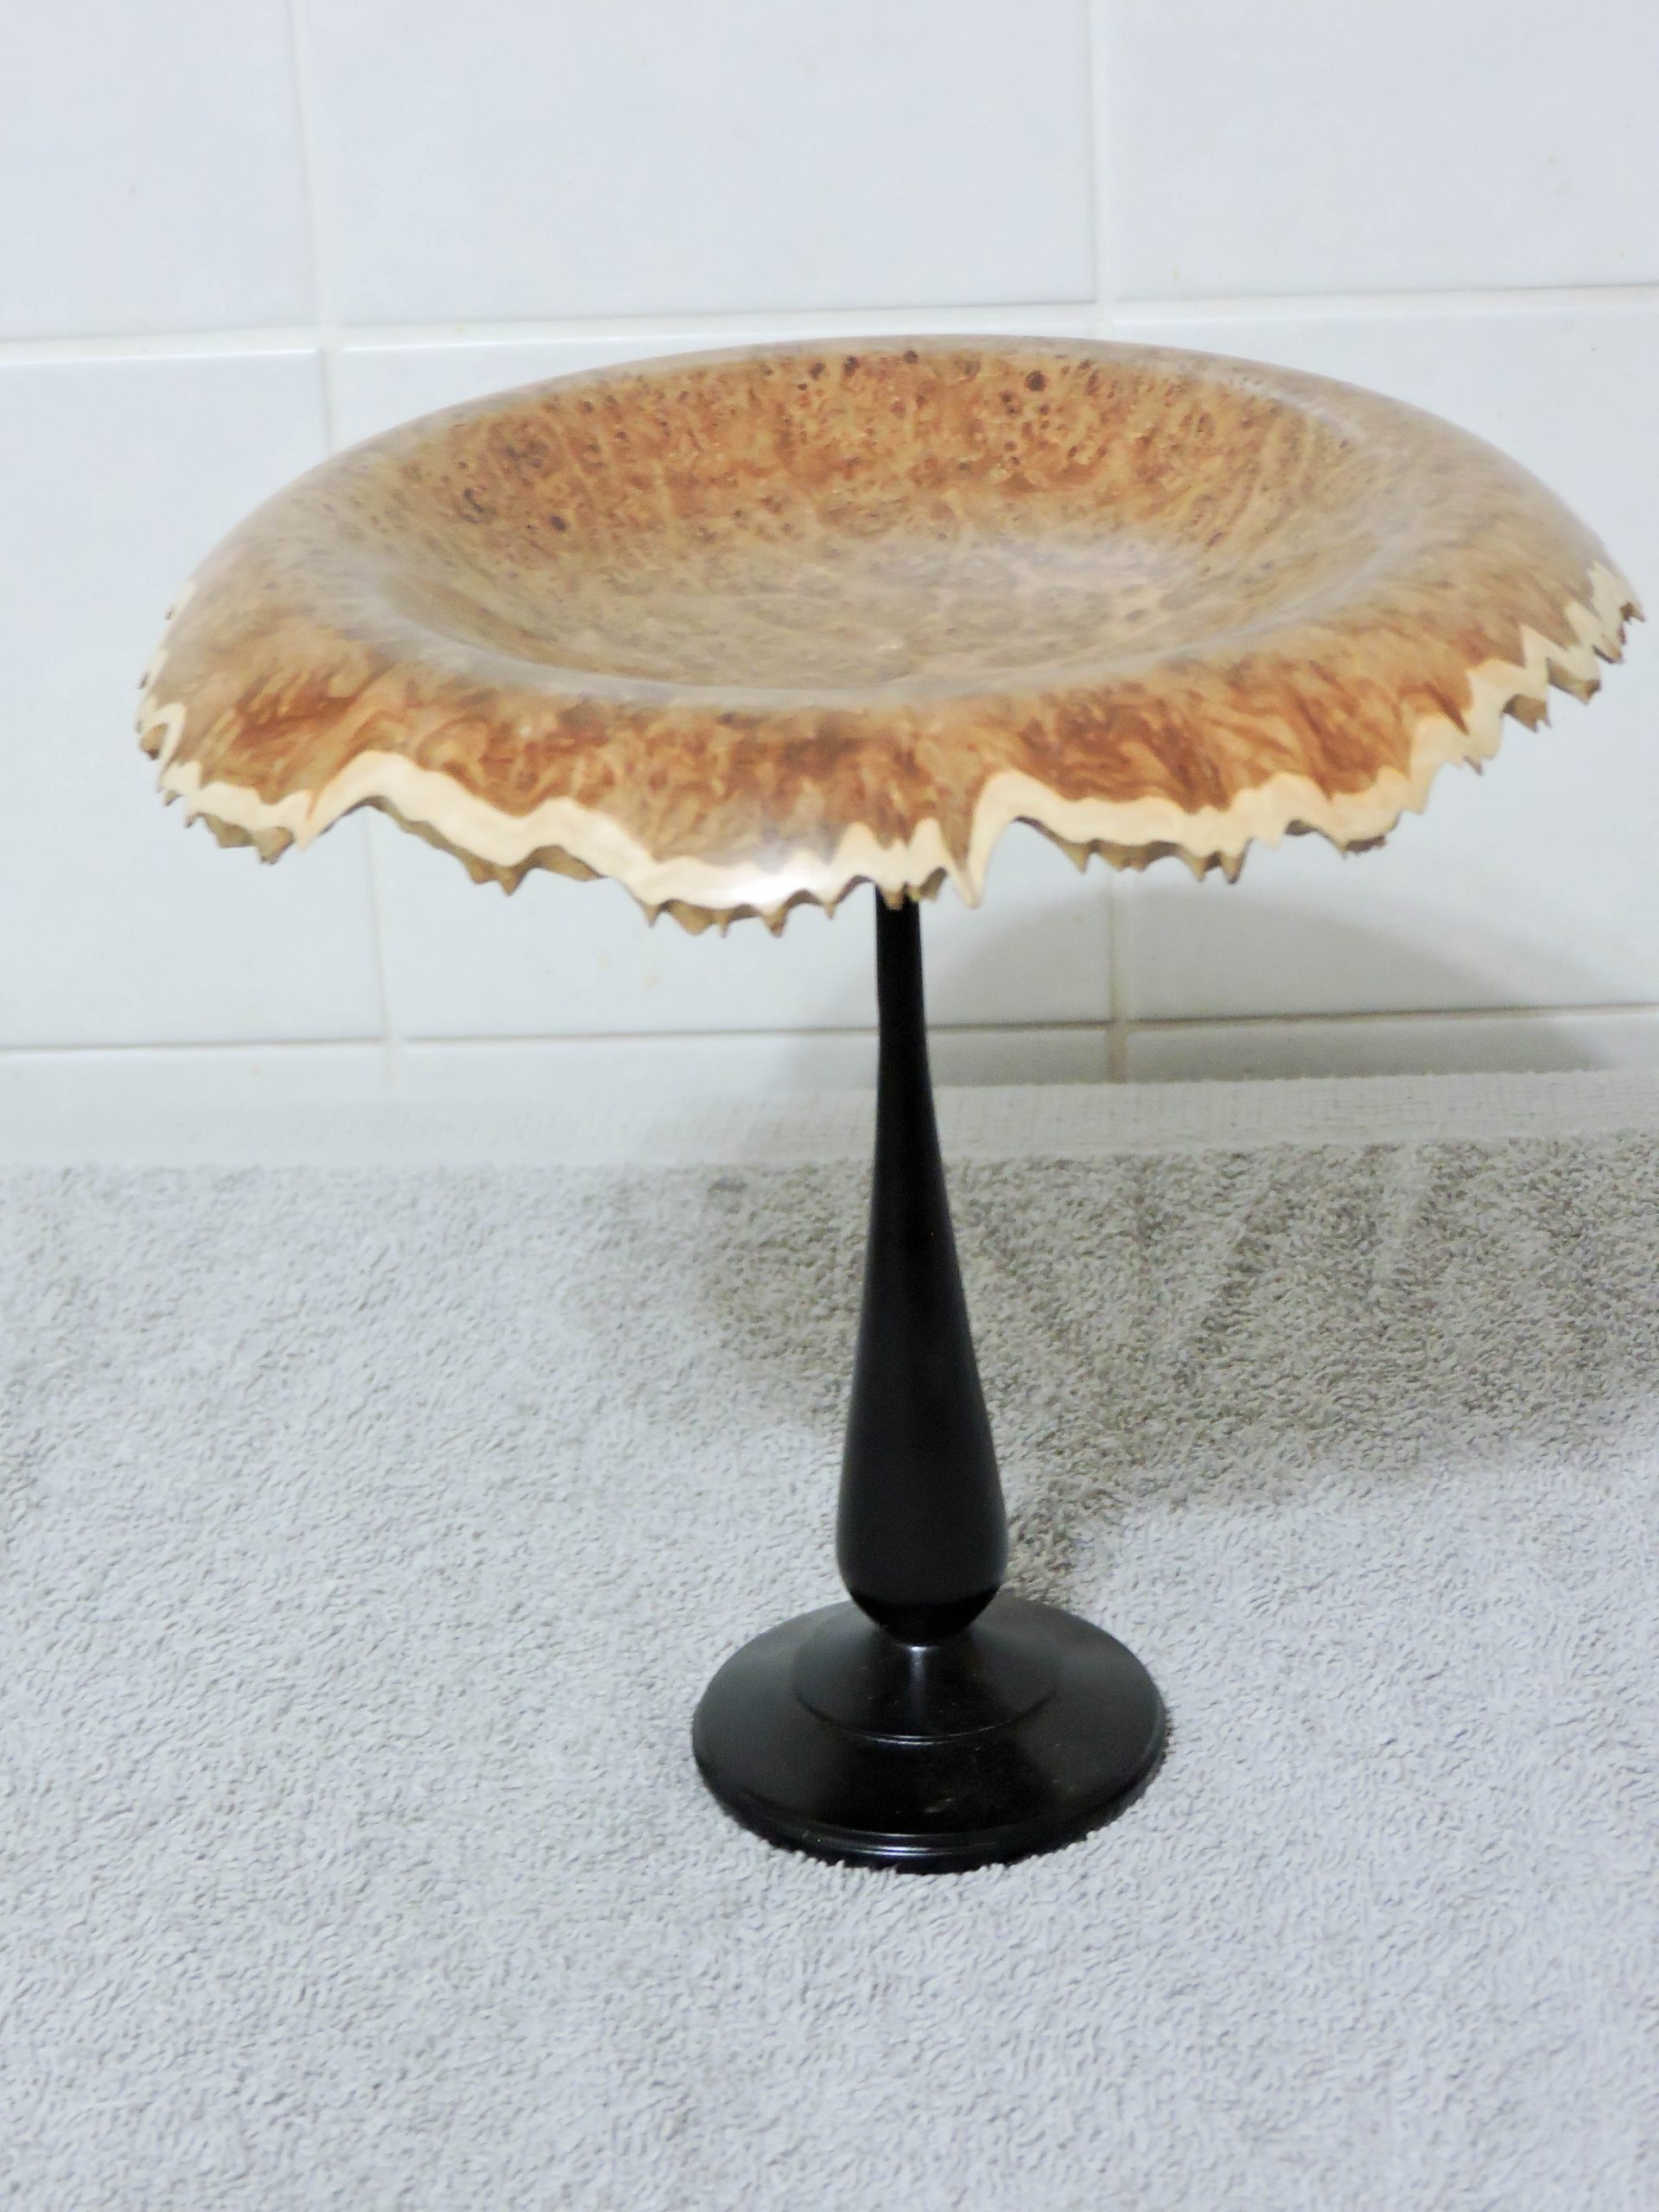
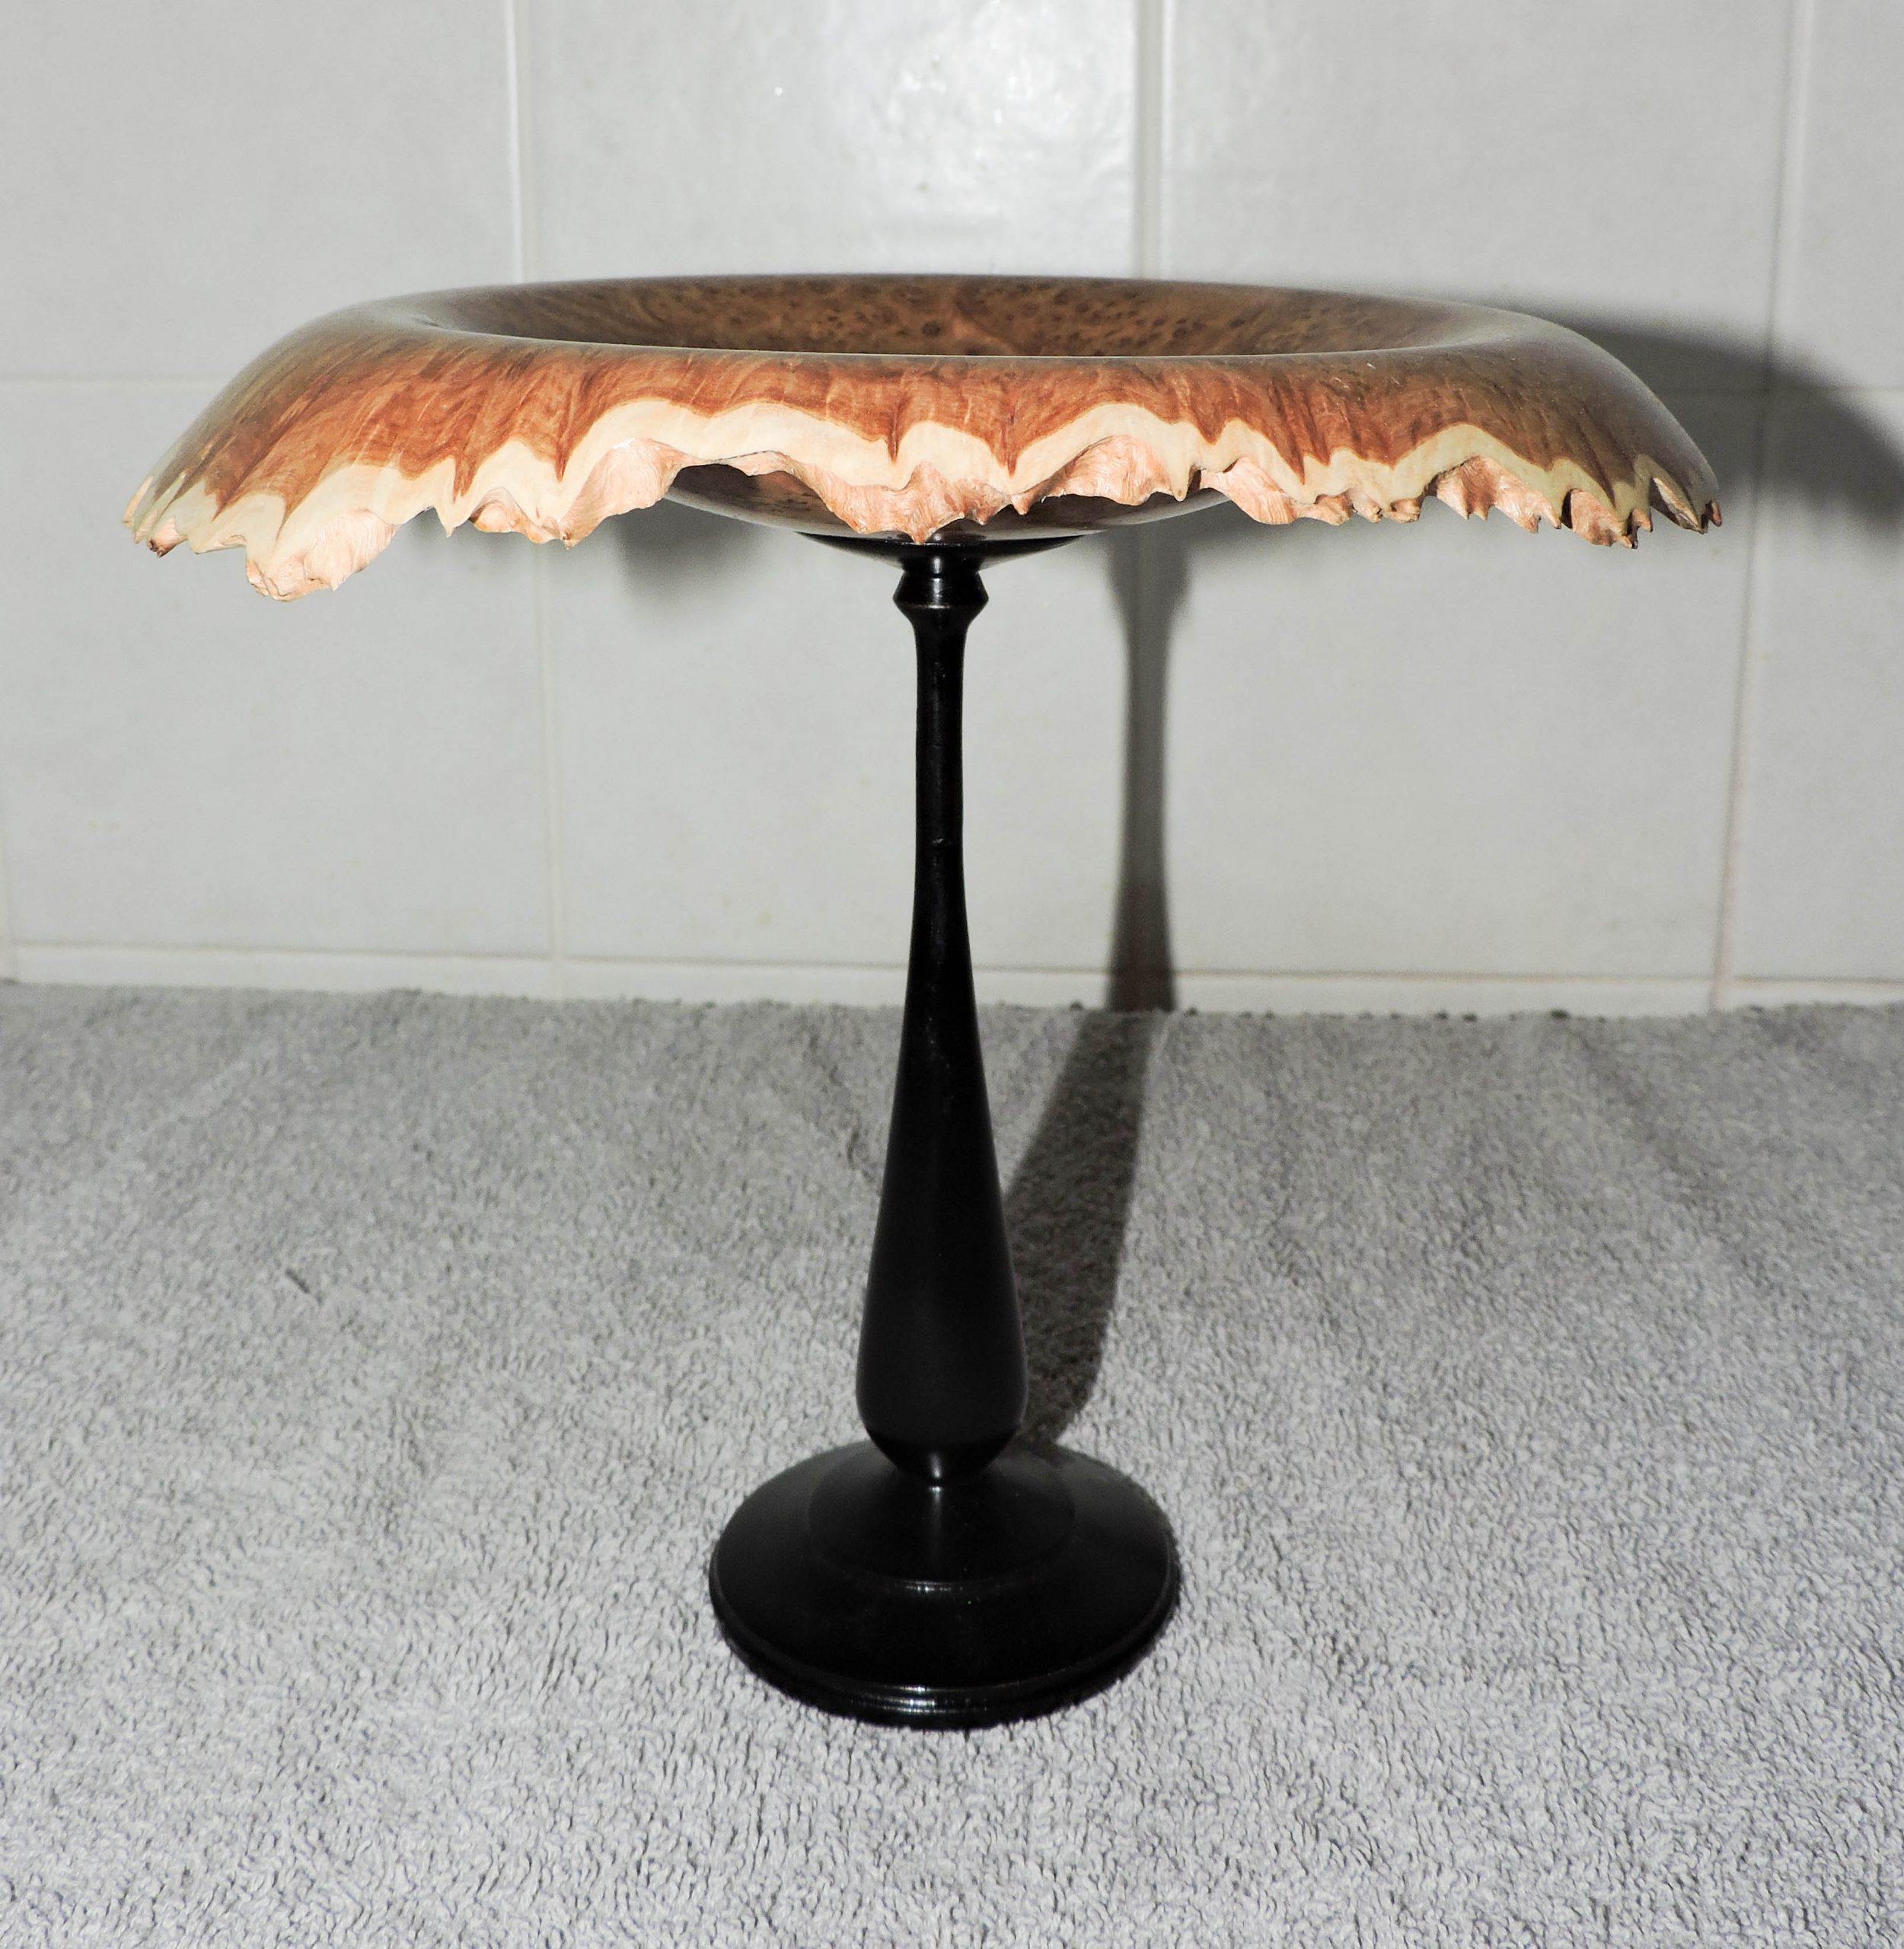
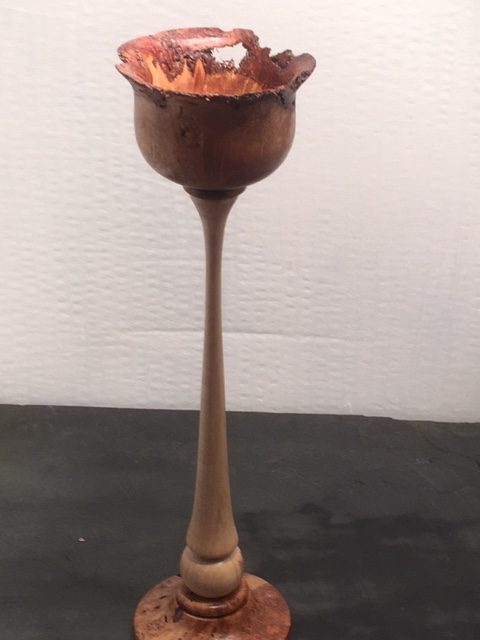
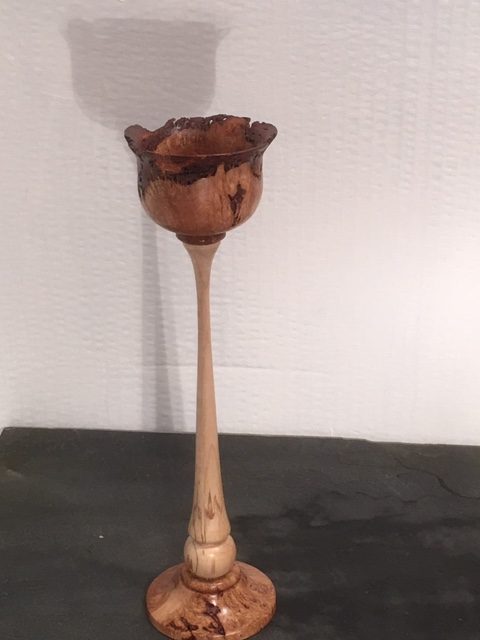
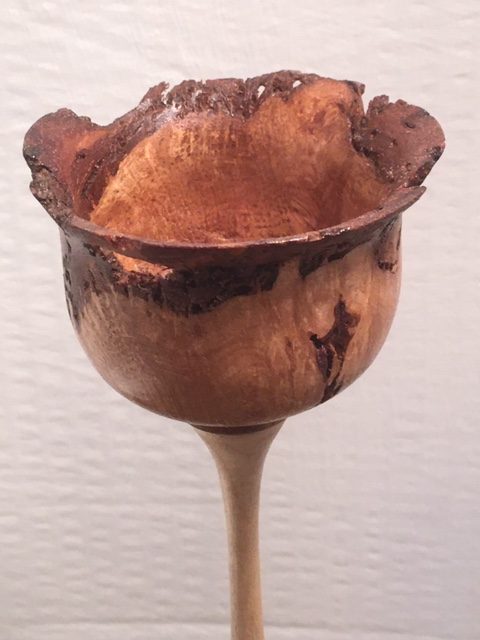
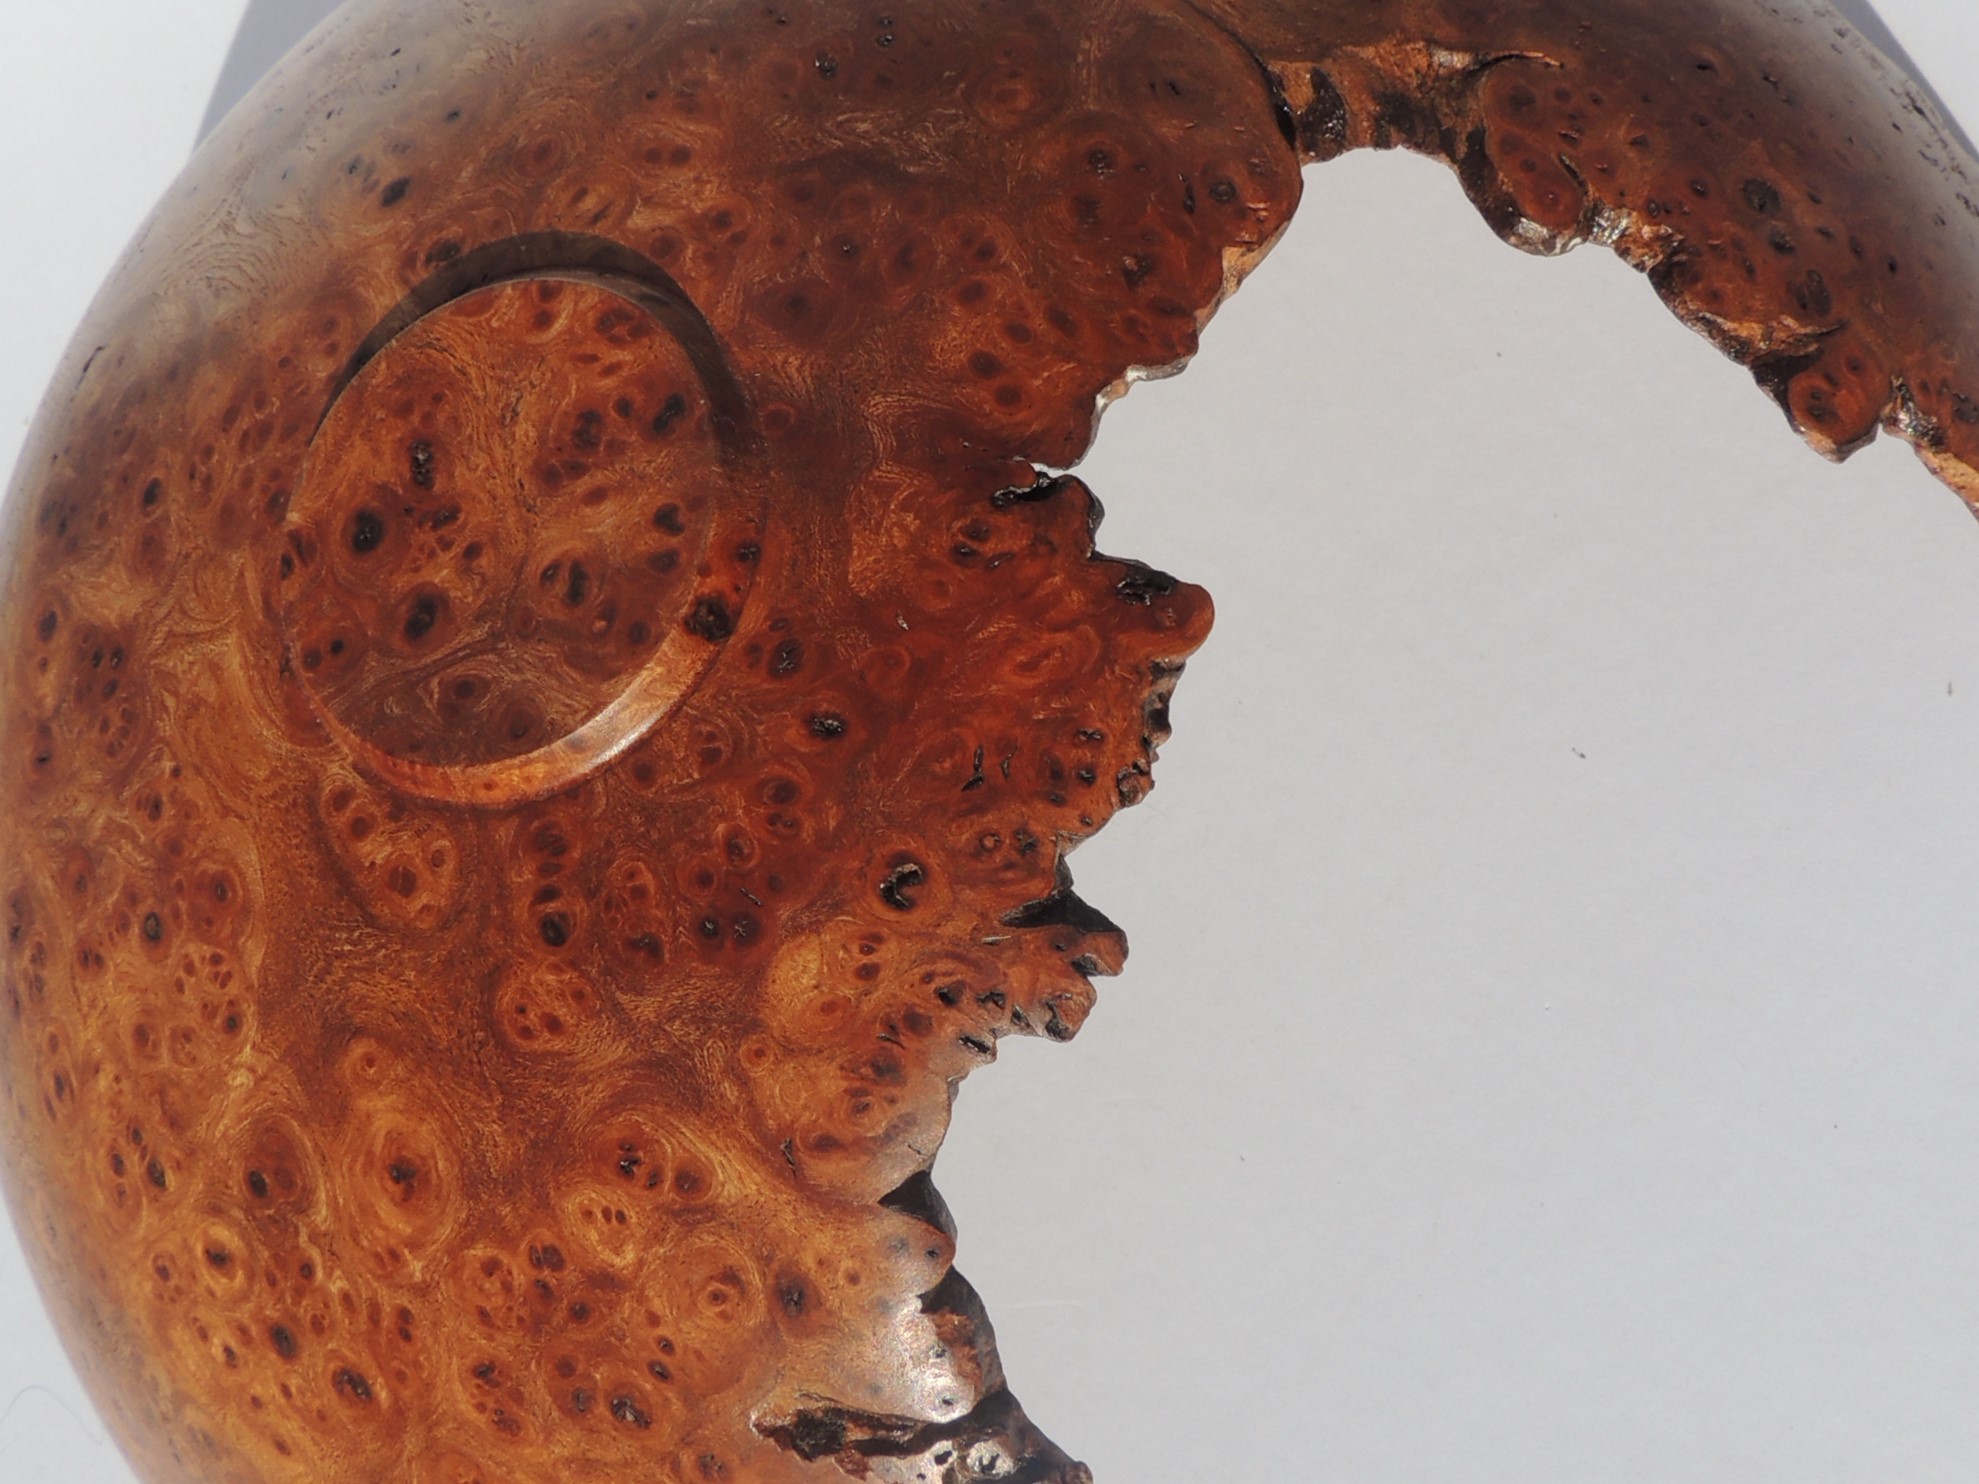
Brown melle burr pedestal bowl
I turned this from the designs that Cindy Drozda produced in her demos. It was a challenge to get the percentages right. The stem is from sycamore and sprayed then cut back with cut and polish by chestnut finishes. The bowl is finished with woodwax 22.
Firstly, the bowl was reverse turned to get the natural edge, I then turned the base and chucking point and finally the bowl. The stem is turned and checked to see if the proportions were right. Finally the 2 were glued up to finish.
Graham Legg – A large Ash vase with a natural edge
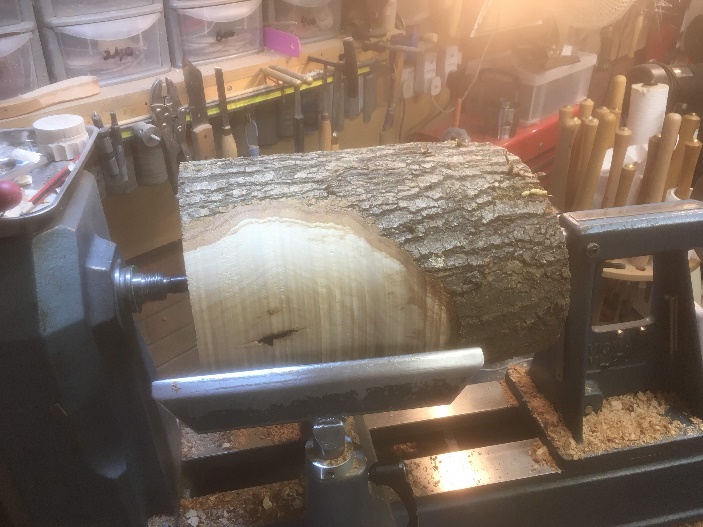
As a reasonably new woodturner, I was very keen to learn more about how to hollow out a large vase, and in particular, which tools to use. With this in mind I spent a very enjoyable day in the company of Mick Hanbury (who was absolutely brilliant). I started using various hollowing tools on small pieces of wood, then Mick produced half a tree for me to play with!
Photo No.1 (Left photo) is the “tree trunk” centred and being turned down to round. I could not believe how heavy this lump of Ash was, and how it could be held safely with a steb centre. The weight was approximately 20kgs at this stage, with a length of 65cms and a width of 35cms
At a very early stage, I realised that my normal “aggressive” style was not going to work. This large and heavy item required sharp tools, finesse and a lot of courage – skills that I am constantly needing to work on!
I was introduced to a variety of hollowing tools, with some really long and solid metal bars (almost like a road worker’s crowbar!), and a variety of cutting edges, some with a collar (for use on wet / green wood), and some with carbide tips. This was an amazing learning experience, and very scary!
I had not realised that in order to keep the heavy piece of wood secure, and safe, what you actually do, is leave a central column of wood right down the centre of the hollowing process. After some considerable effort, the inside of the vase was eventually 40cms deep. The supporting column is turned away as one of the very last cuts before removing the vase from the lathe.
Photo No.2 (middle photo) – You can see the bark remaining on about 1/3rd of the outside of the vase.
The top has a band of Chestnut products Ebonising Lacquer. This is approximately 4cms wide. The base of the vase is finished again with Ebonising Lacquer and then Copper Gilt Cream was applied.The final finish was three coats of Finishing lacquer. This has provided a satin finish appearance to the wood.
Photo No.3 (Right Photo) – Here you can see the other side of the vase, with some beautiful natural grain. You can also see the inside of the bark (Cambium layer?) just being exposed as the much darker brown colour.
In conclusion, this was a challenging and steep learning curve. You need to have total confidence that the heavy wood is secured onto the lathe (but always being mindful and respectful to the possibility that it might go for a spin!). Having thoroughly enjoyed my time with Mick Hanbury, I subsequently bought a Simon Hope 5mm carbide tool
Eddie Elliott
Elm burr and spalted sycamore
I turned it in three pieces burr elm top and bottom, the first time. I have done it in three sections. The live edge on the cup had a couple of coats of sand and sealer to help the live edge before sanding.
The indentation and hole in the top give it that bit of character.
Stem was turned in spalted sycamore with a tenon on both ends. then fixed to the cup and base, which was turned out of the same piece. All were sanded to a finish before glueing up, then finished with three coats of soft satin treatex.
Graham Brooks
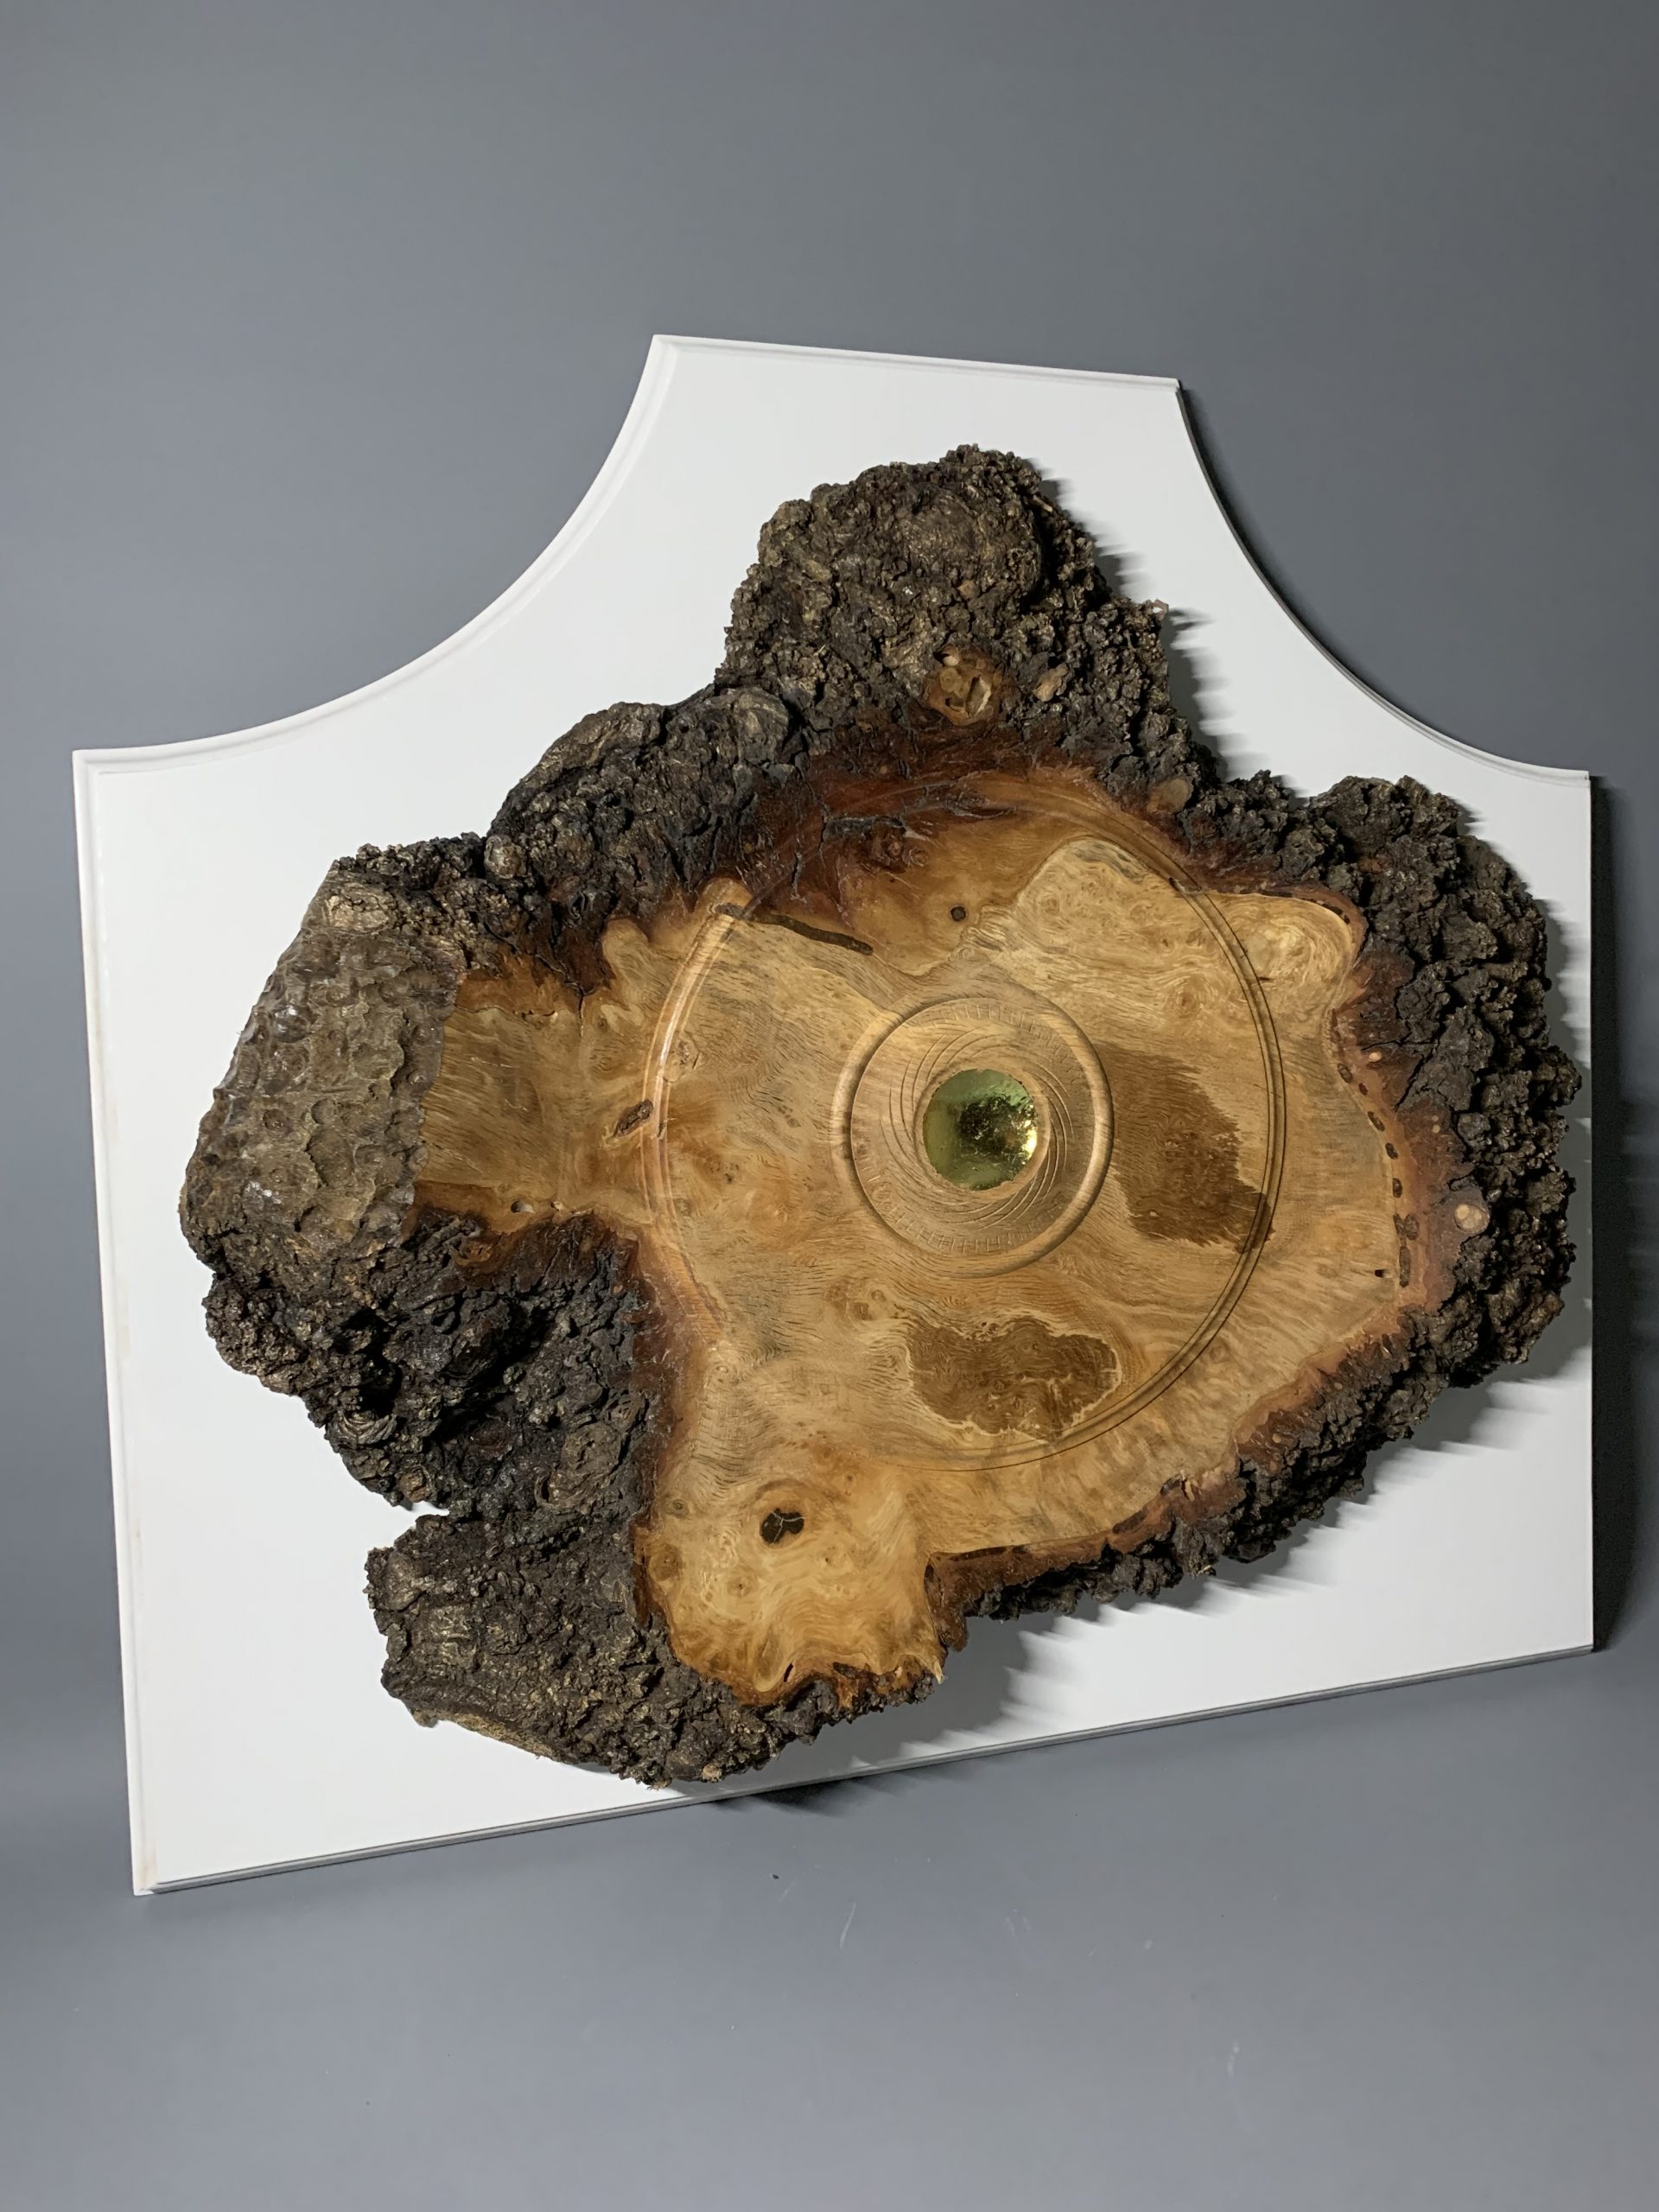
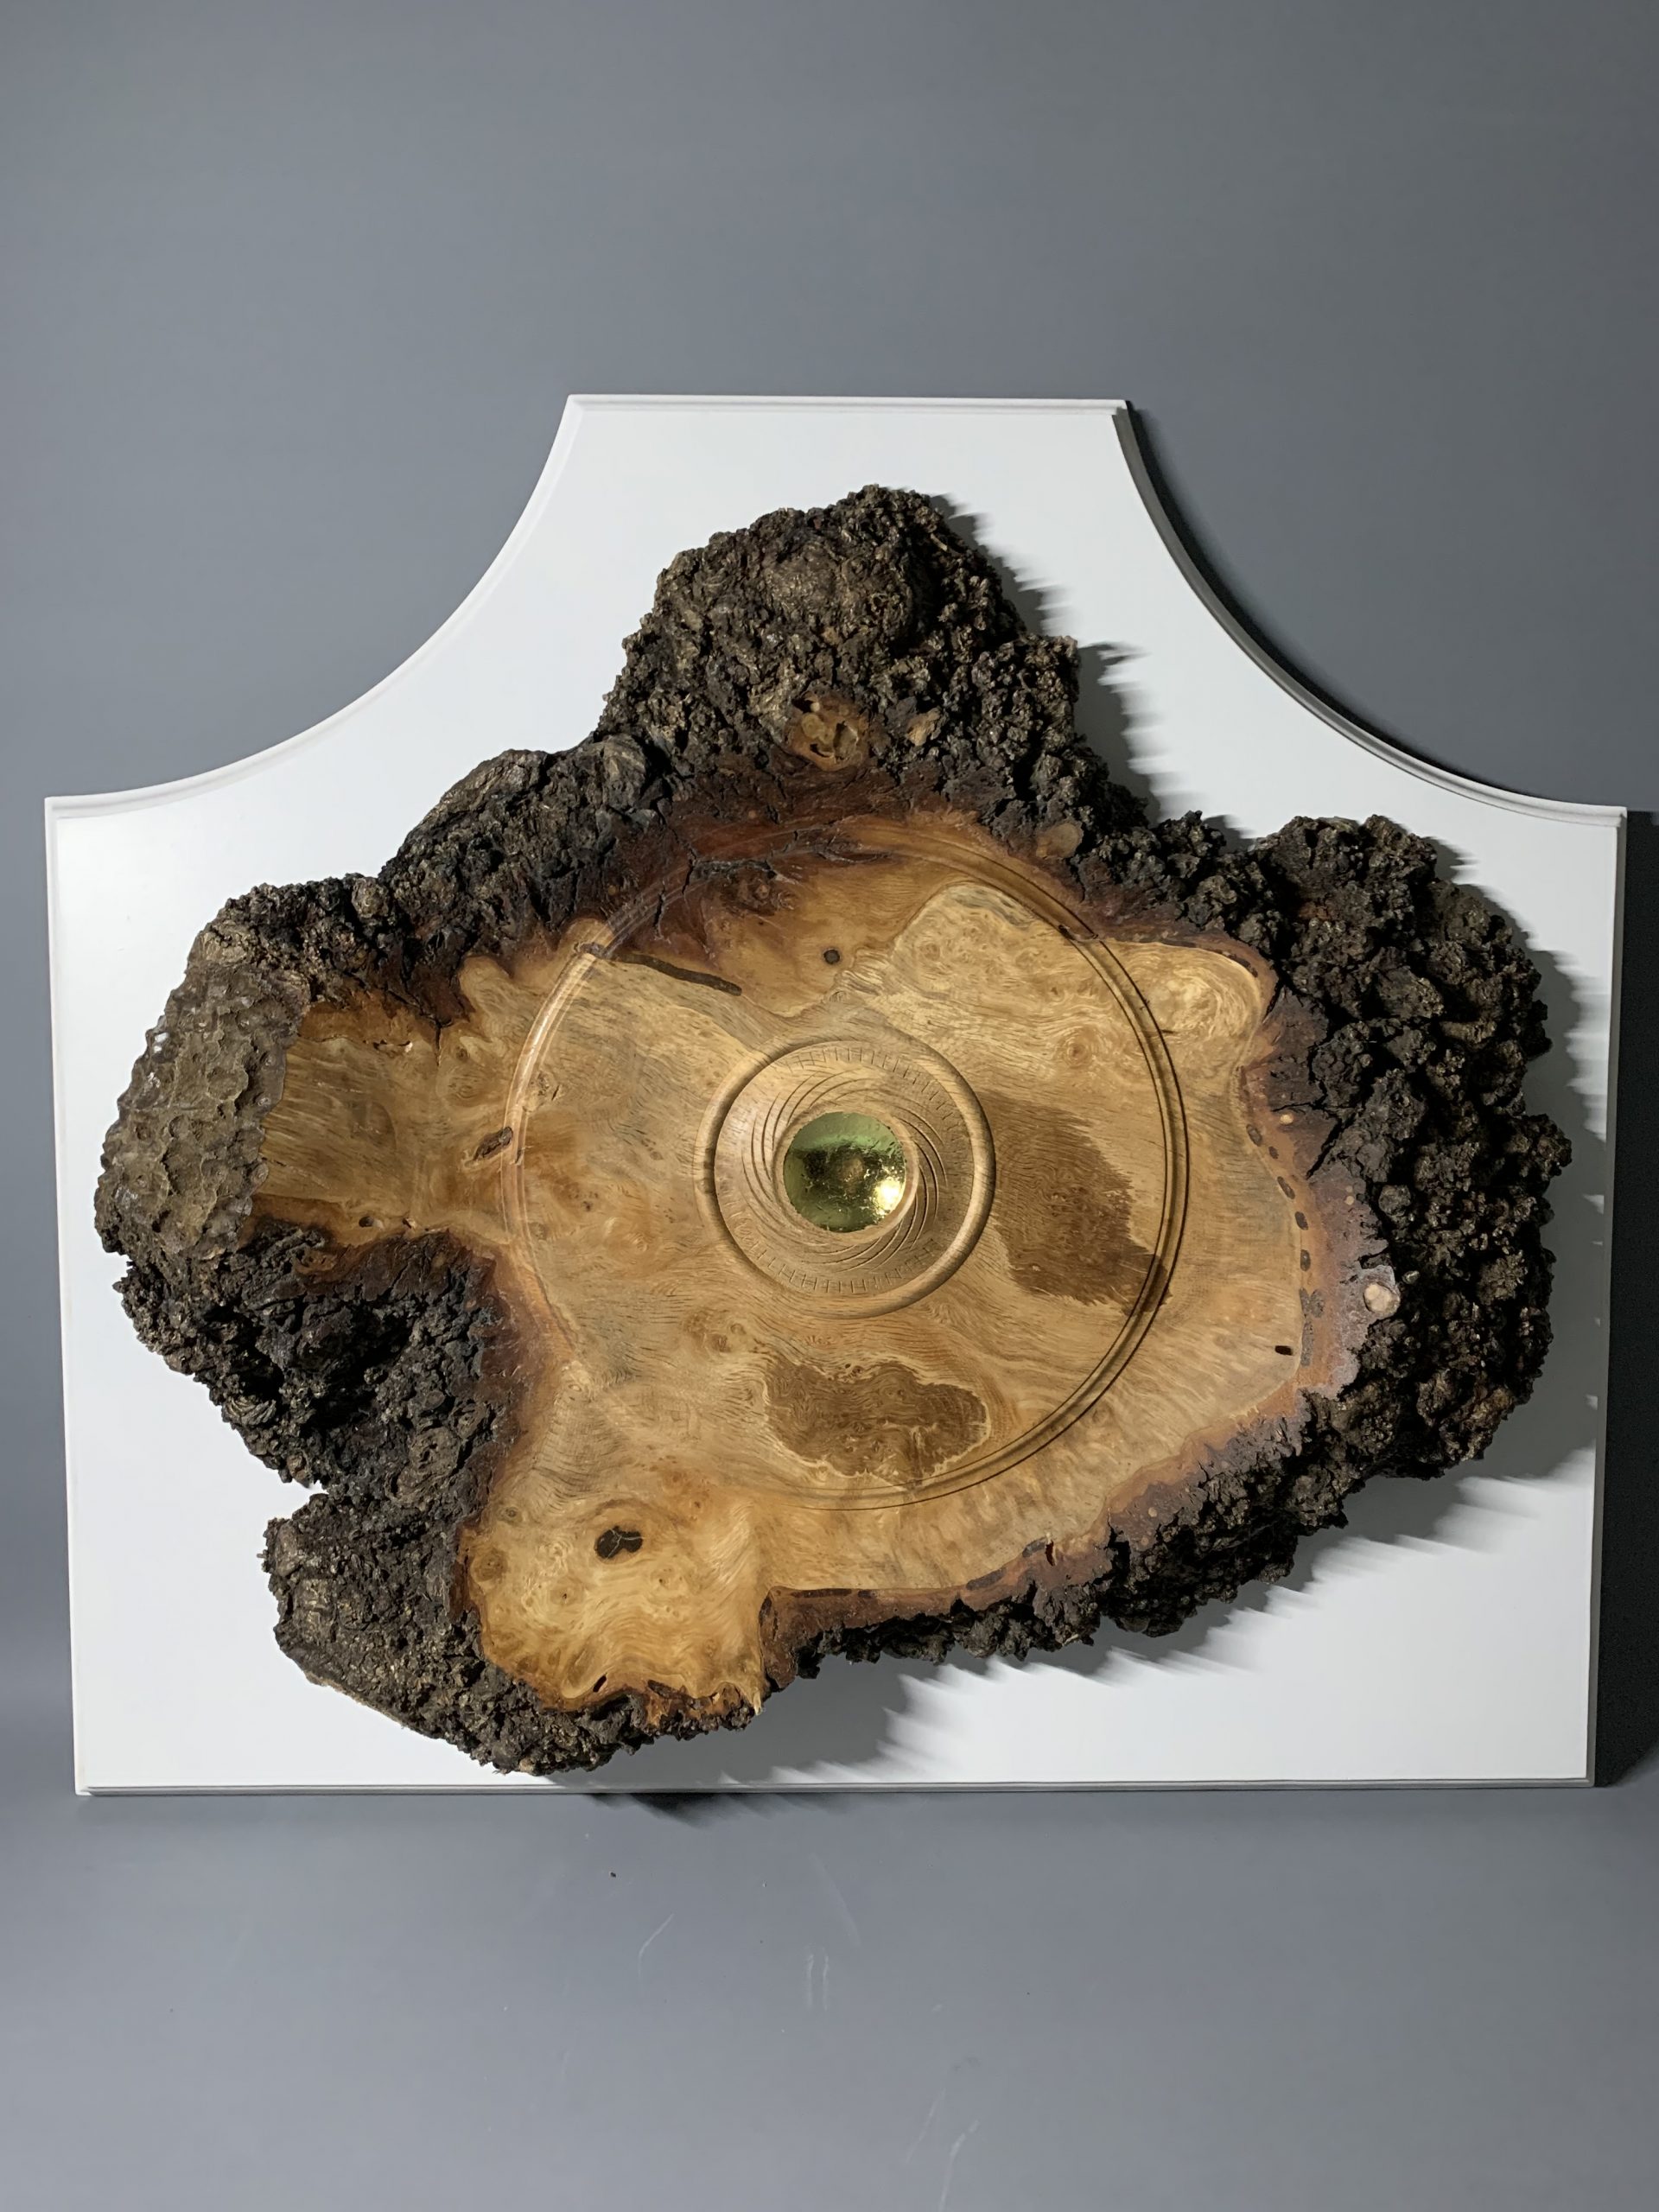
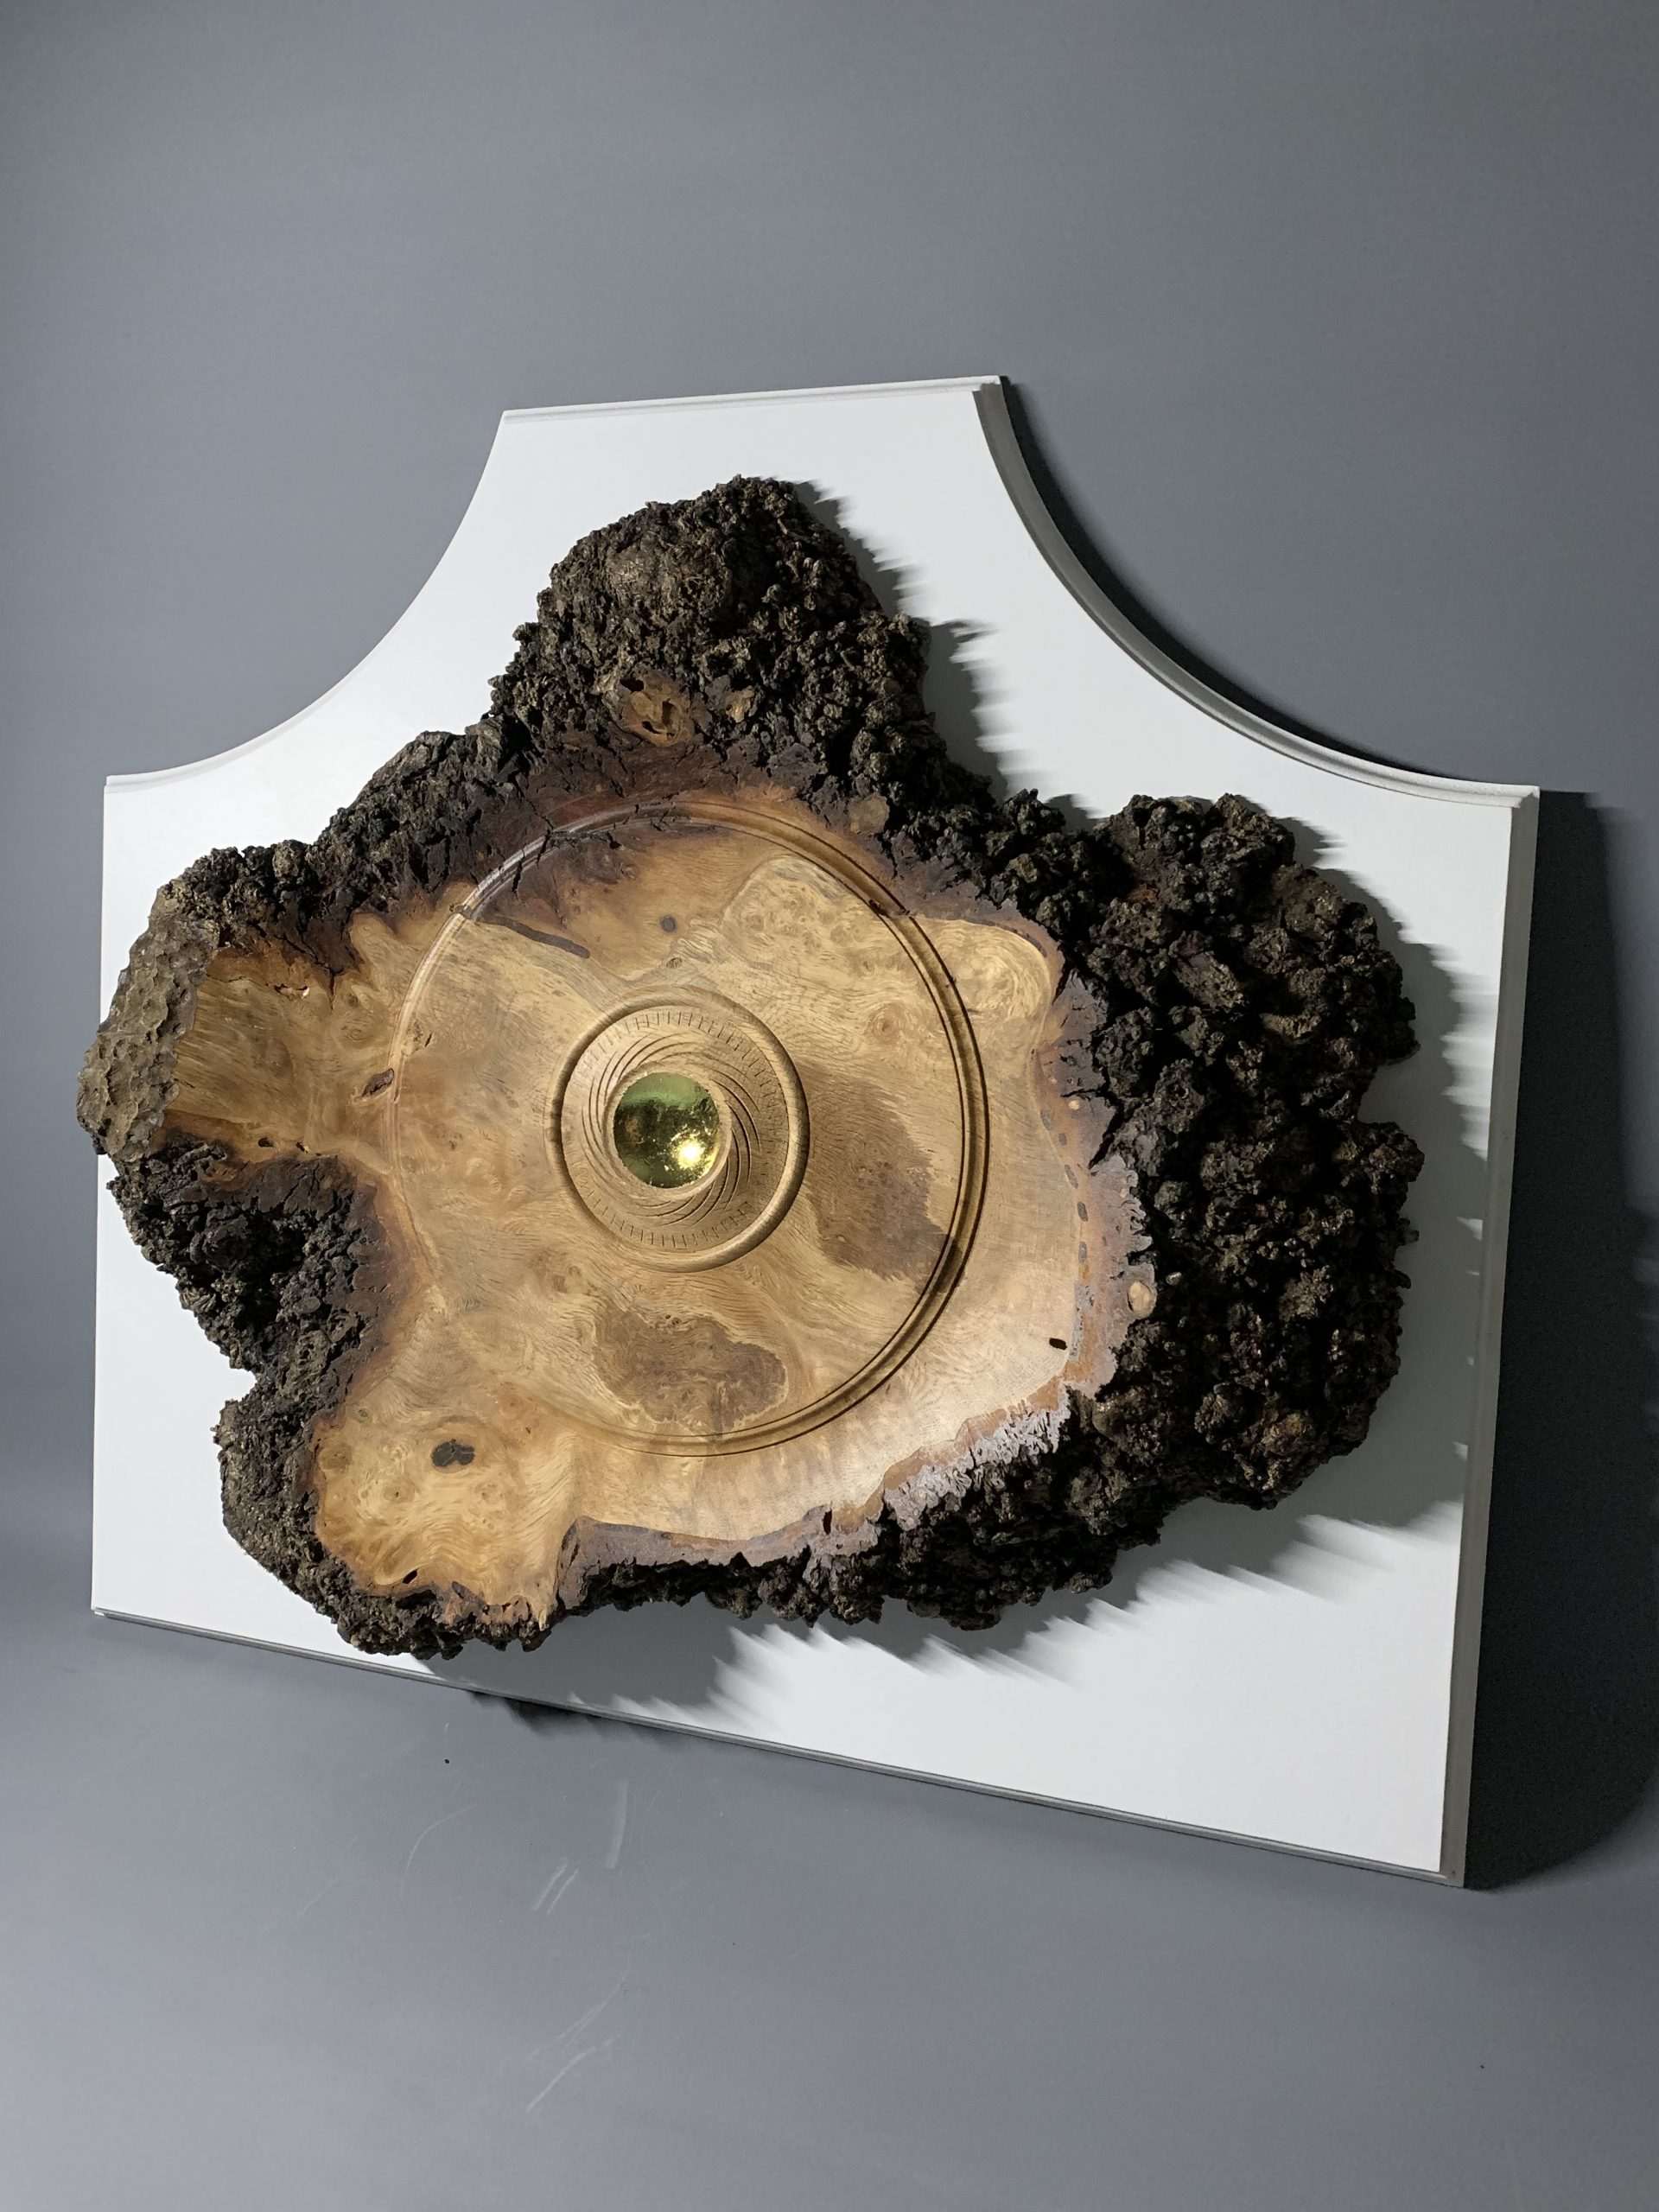
I decided to tackle a wall hanging piece for this month’s Show and Tell and found a piece of oak which was all bark on one surface and very undulating. The piece was quite thin in parts the bark being almost half the thickness in places. The cut surface indicated that there was some burr in the piece. The maximum dimensions across the piece were just over 500mm.
I mounted the piece on an MDF backboard and fitted a face plate as near to centre as I could. The piece was a little too large for the swing of my lathe so turned the head stock through 90 degrees and worked outboard.
Because of the variation in thickness around the perimeter I was restricted in how much the thickness could be reduced without almost removing the surface in parts. There were some worm holes in places below the bark some of which I decided to fill with CA and sanding dust to maintain the integrity of the bark.
I considered colouring but decided it would obscure the various colours of the oak, burr and bark. I settled for a little gold leaf as a central feature and some spiral texturing adjacent. The piece is mounted on a matt white MDF back board to hopefully protect and enhance the bark perimeter. The piece was finished with Chestnuts acrylic satin lacquer over acrylic sanding sealer.
The main challenge I found we deciding how to finish/enhance the centre and when ‘enough was enough’.
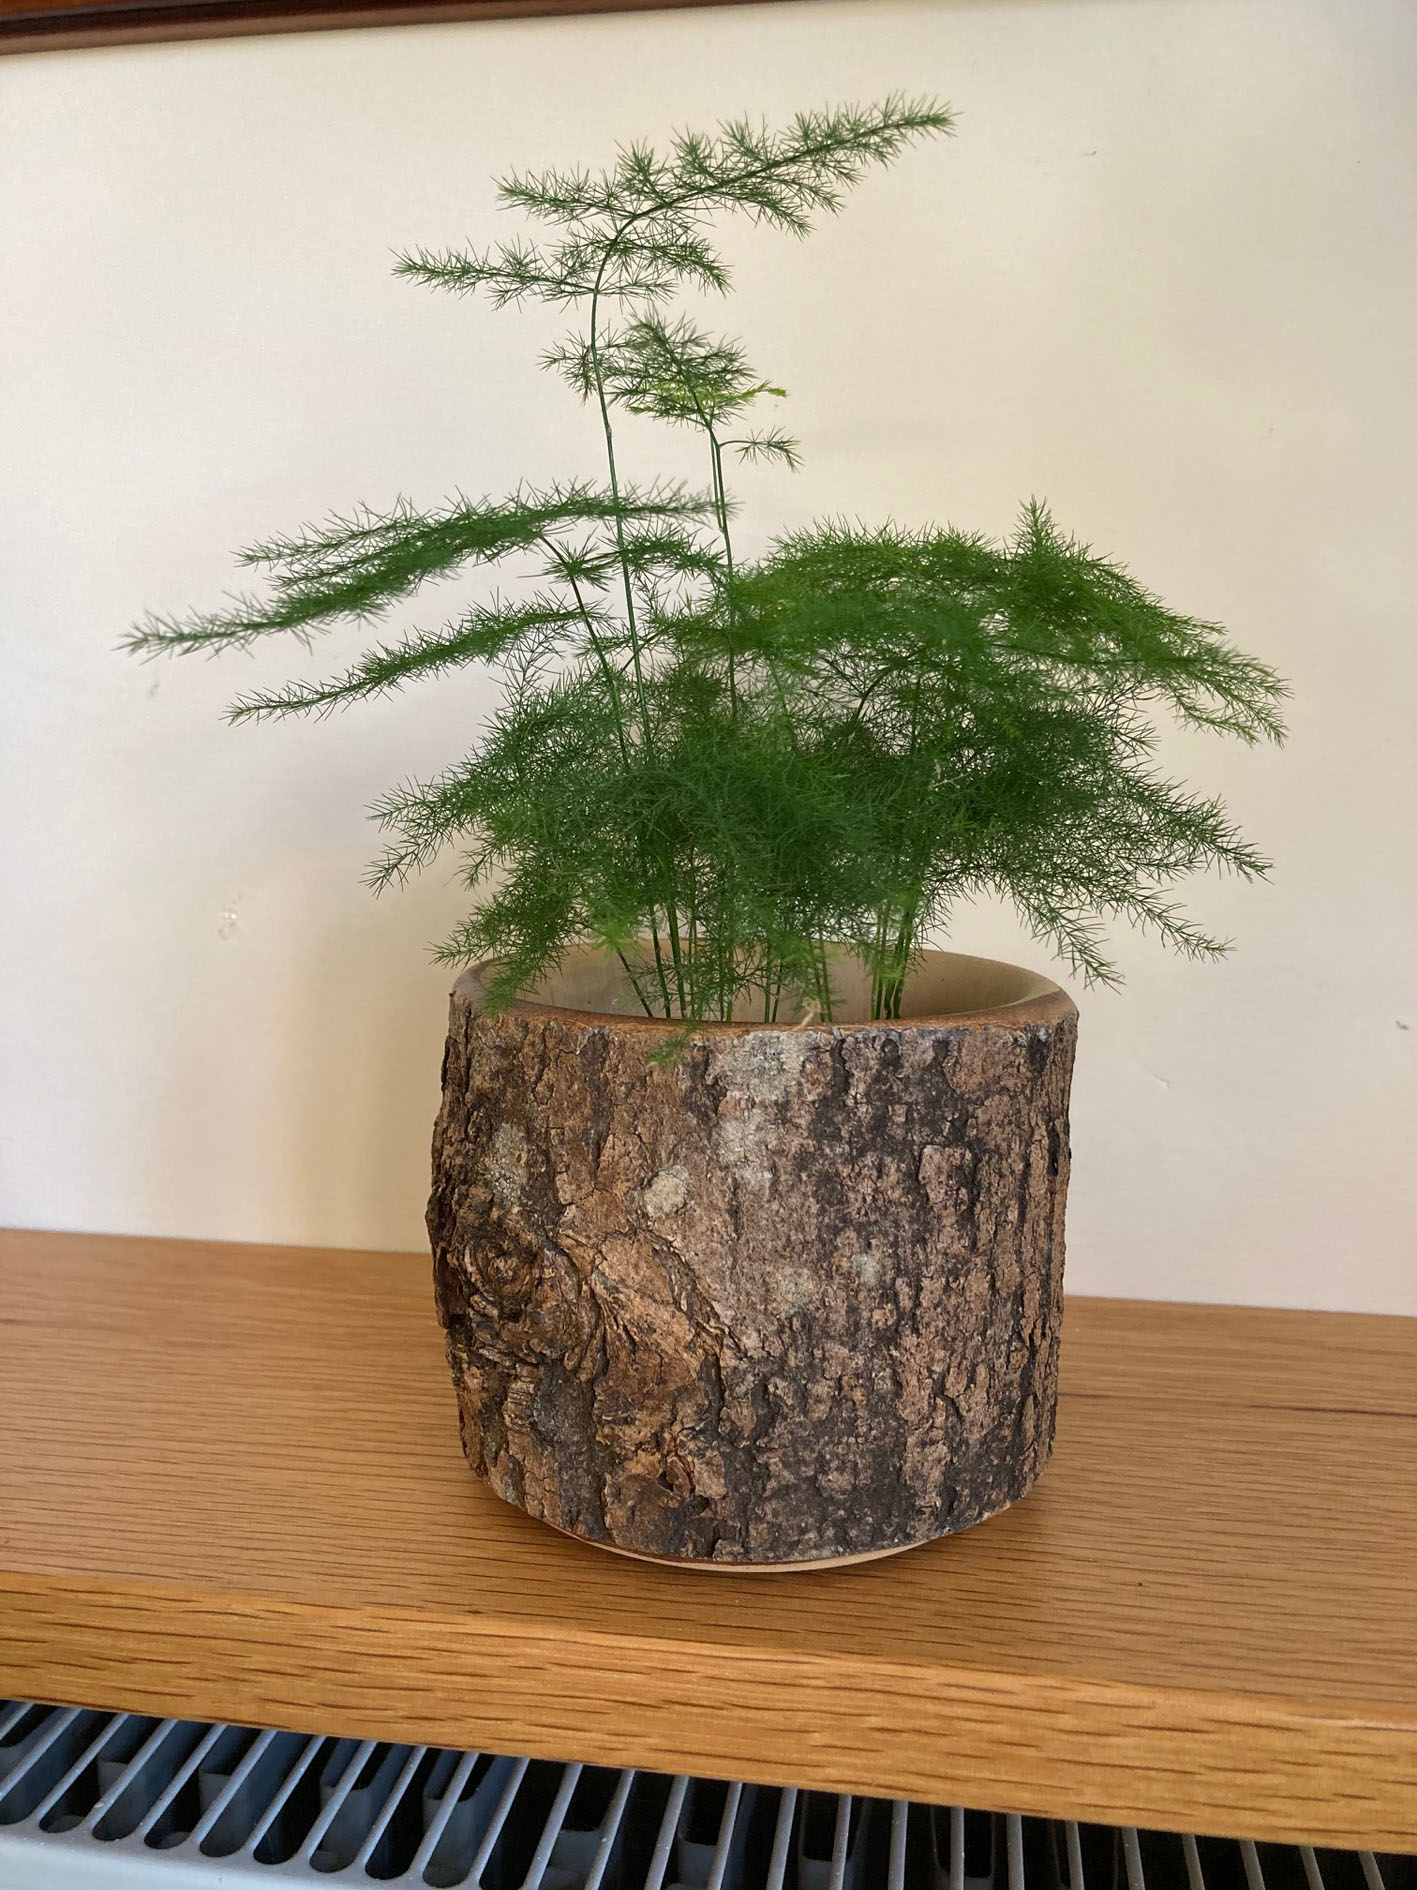
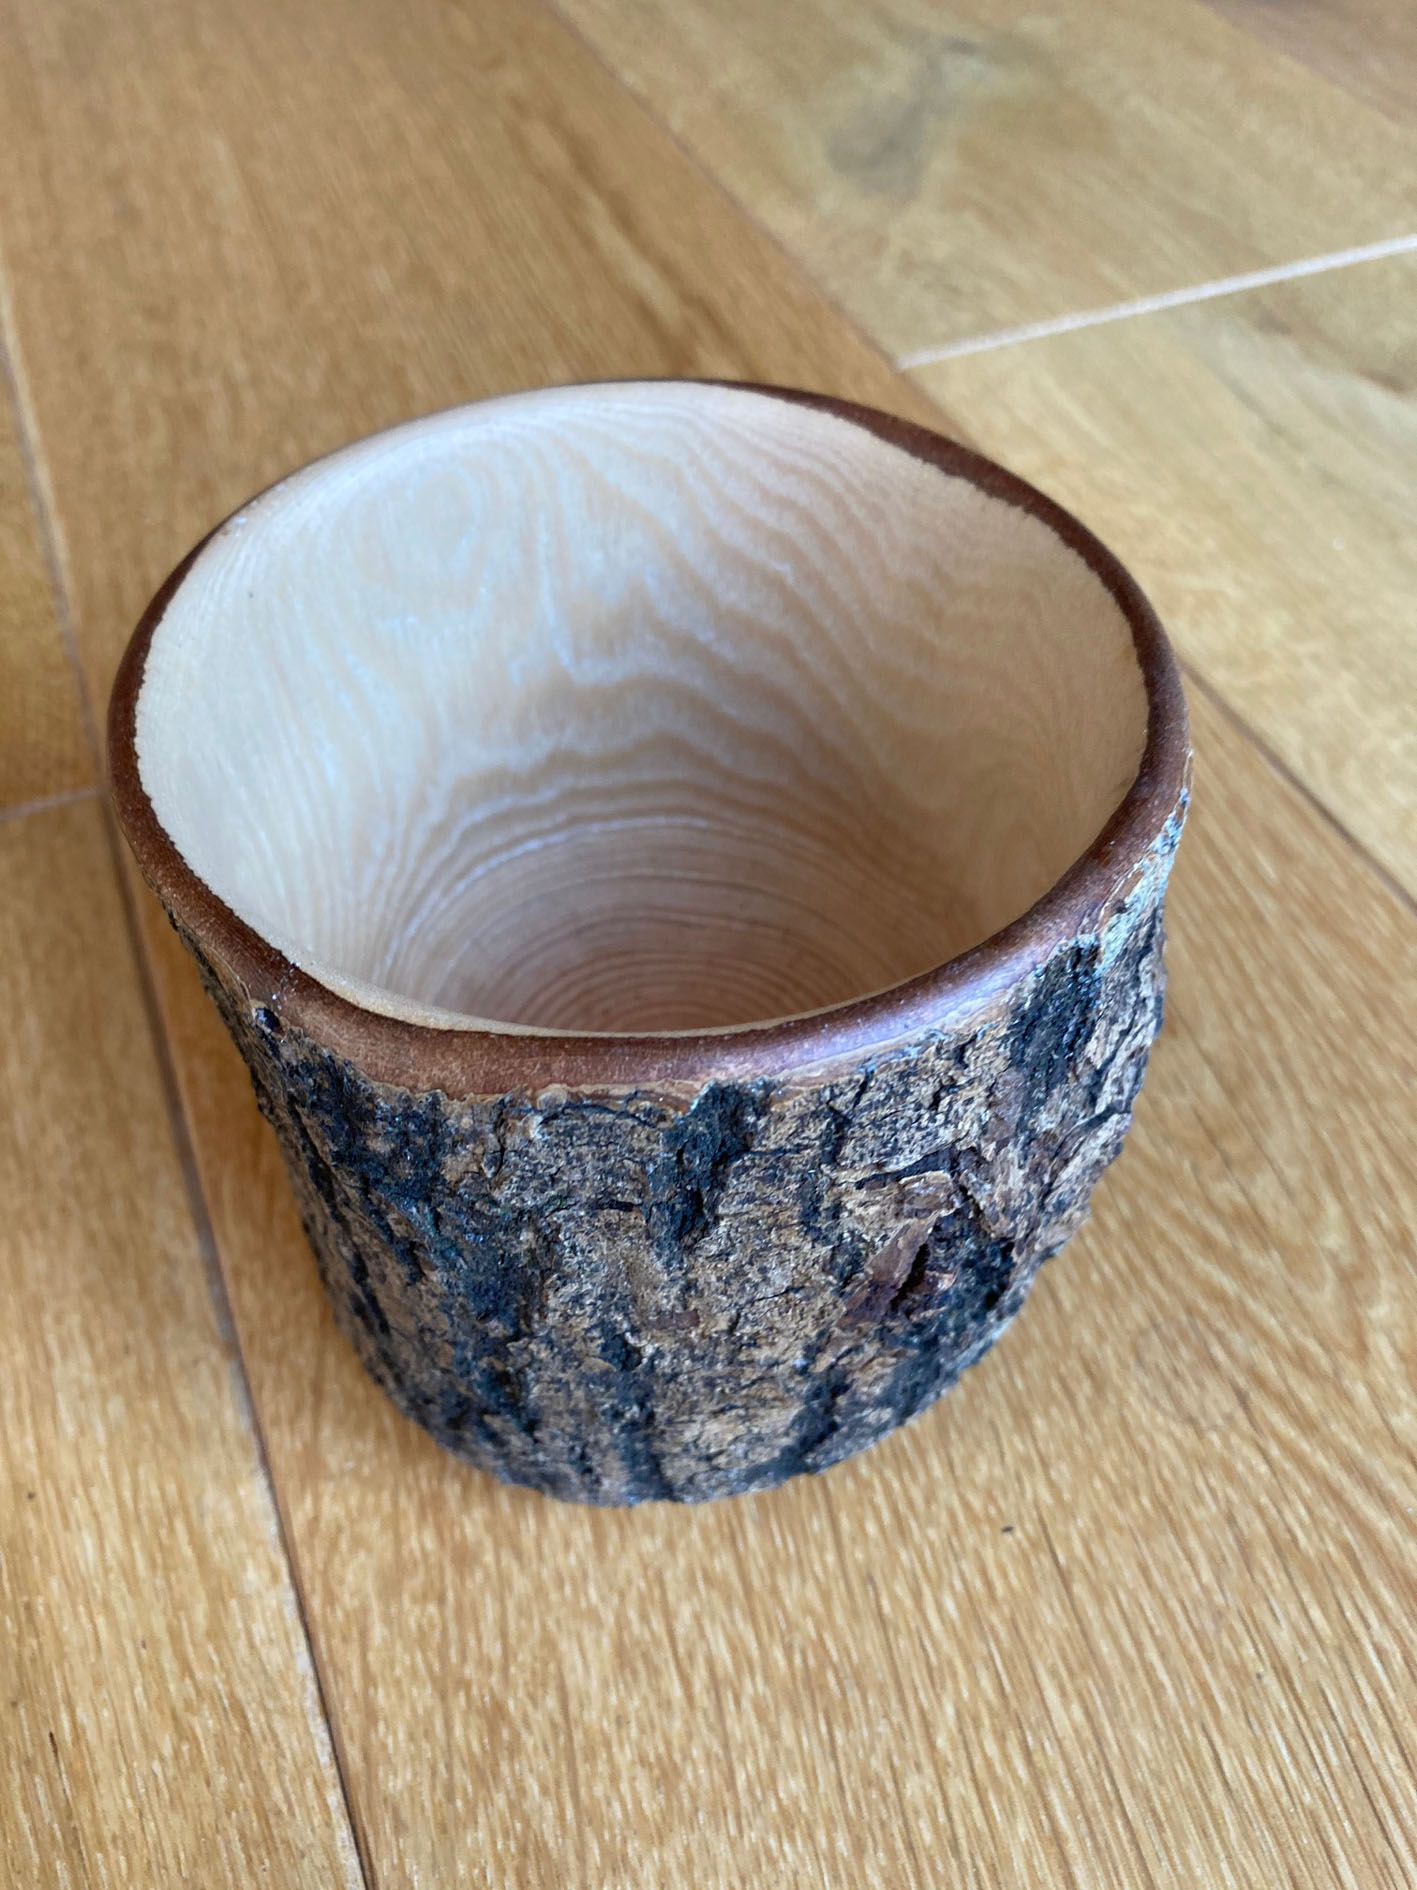
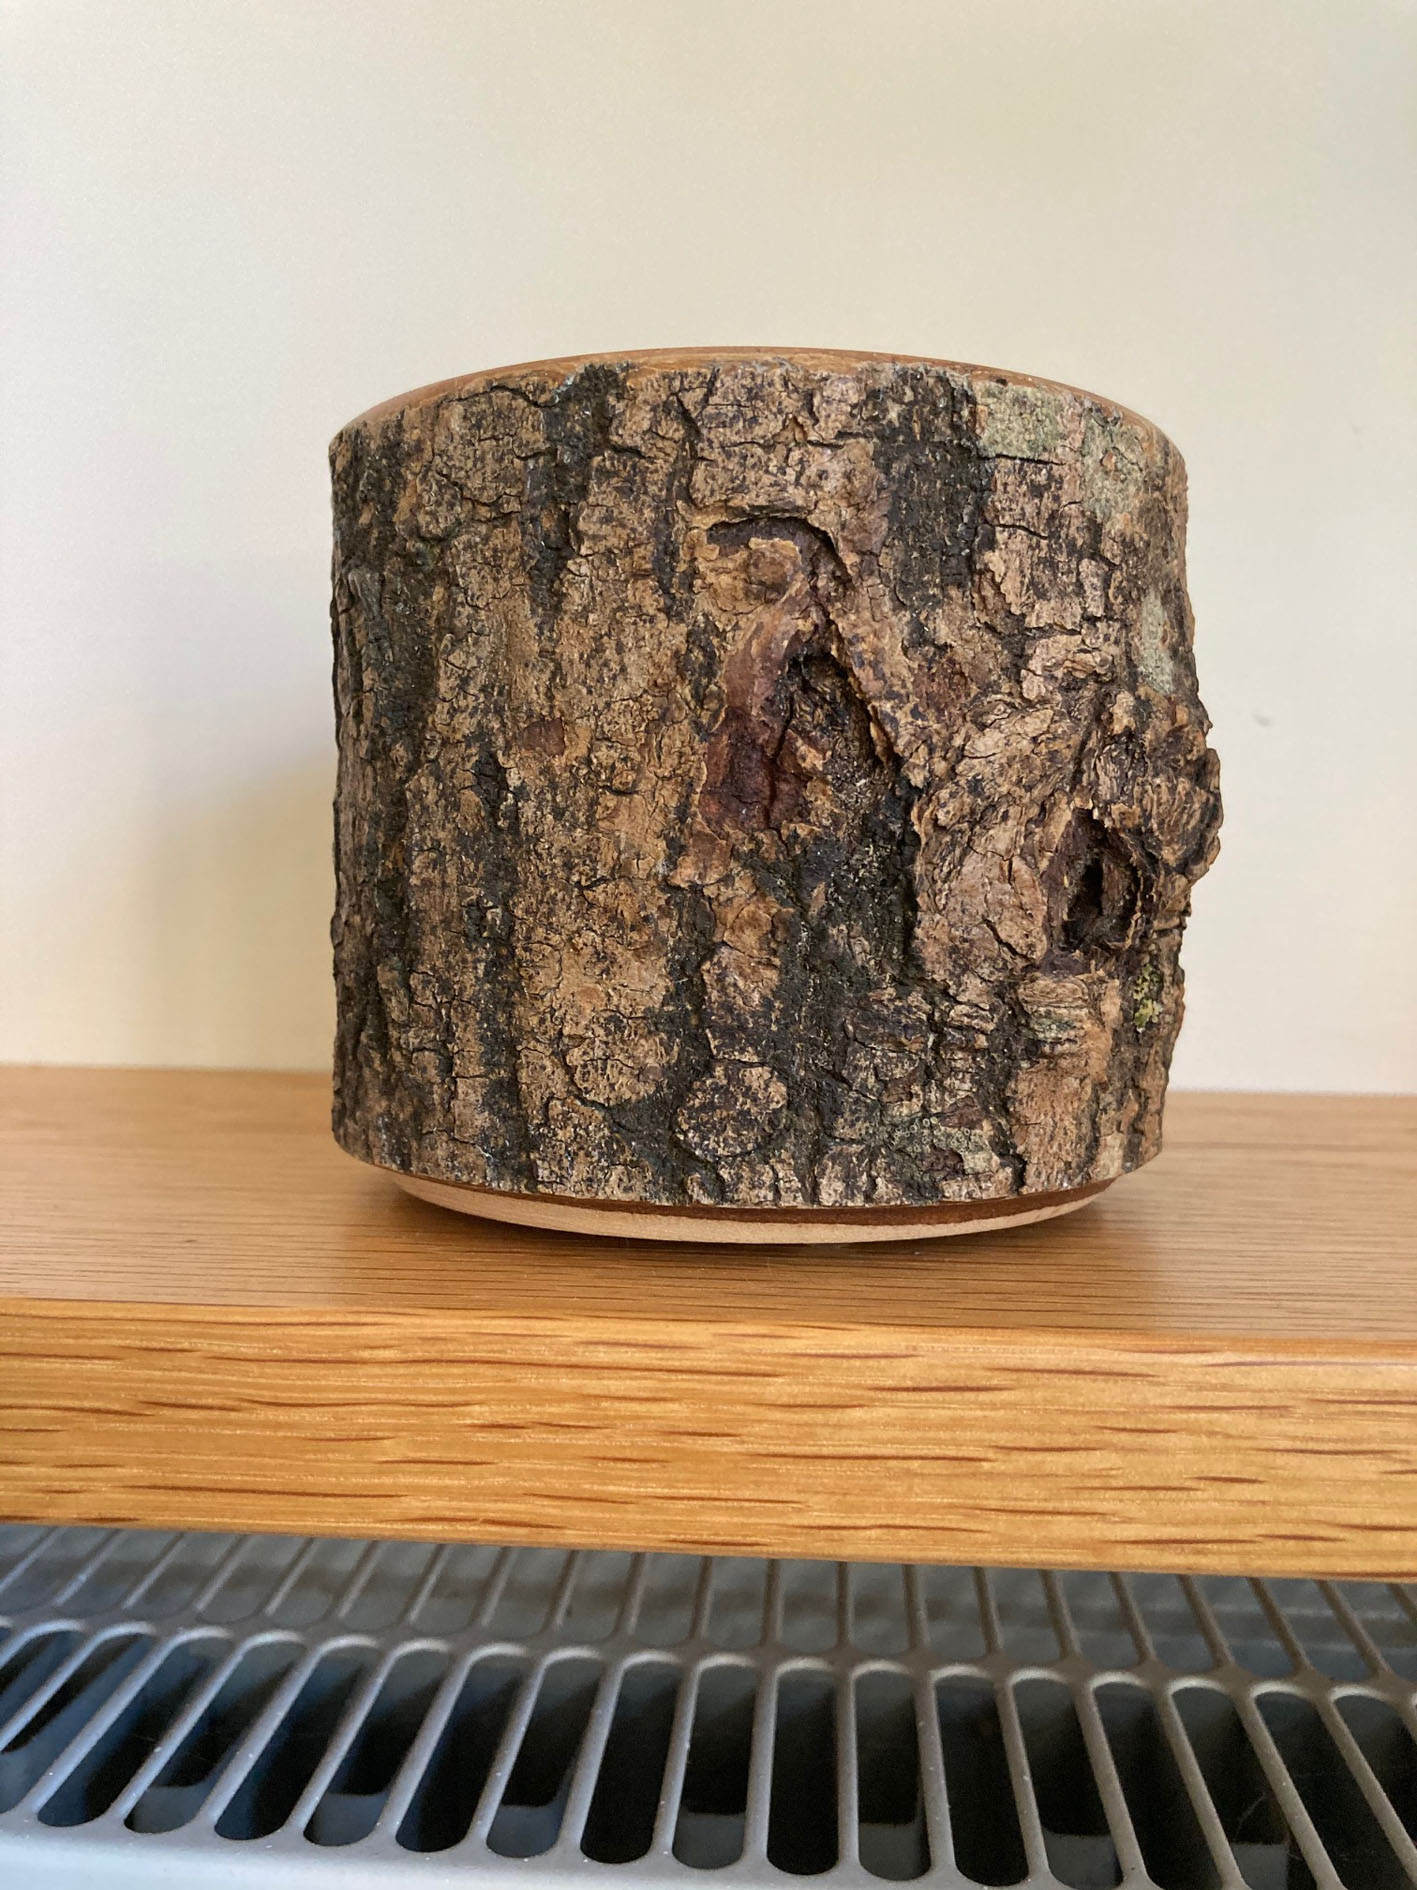
Andrew Wolstenholme
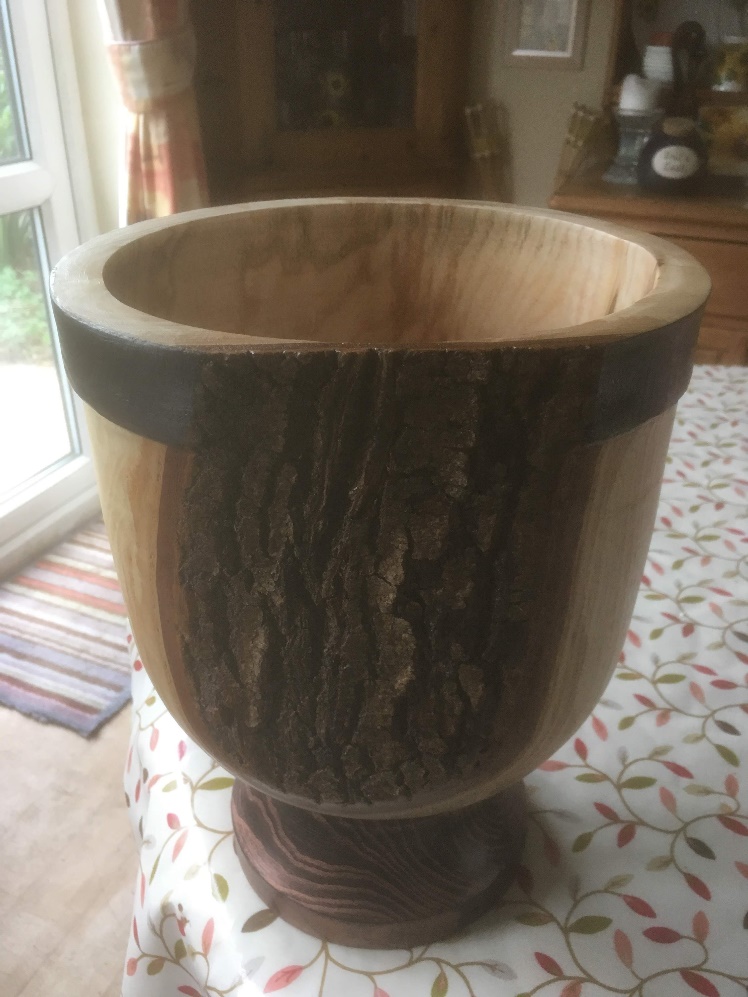
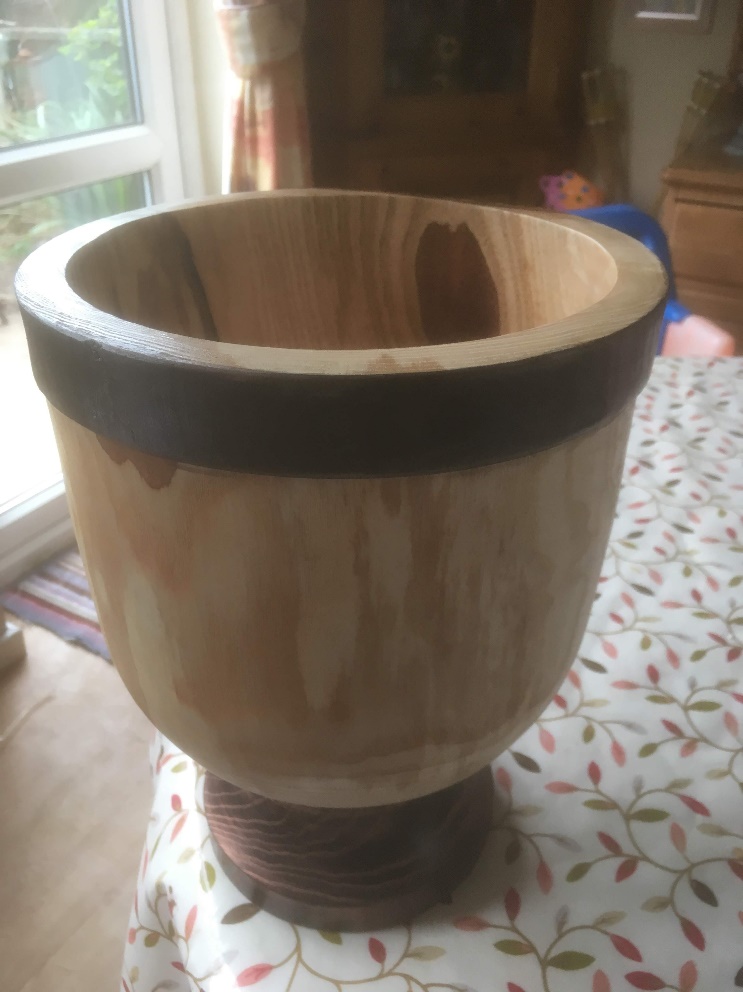
This plant pot holder takes ‘natural edge’ to the extreme. Simple in concept and execution, and very effective. This example was turned from a pine branch off my log pile but I have made others from sections of oak branch. For the best effect the log needs to be as near cylindrical as possible to keep the wall thickness constant, and the bark needs to be well attached. The bark was cleaned by careful scrubbing with a nail brush and water and when dry the complete work was oiled with Deksolya. The inside and bottom of the work was waxed with Colron Finishing Wax but the bark left oiled only. I am quite new to turning (two years now) and my family started nagging me to do something other than bowls. My sister in law suggested that she would like a pot holder and I came up with this idea!
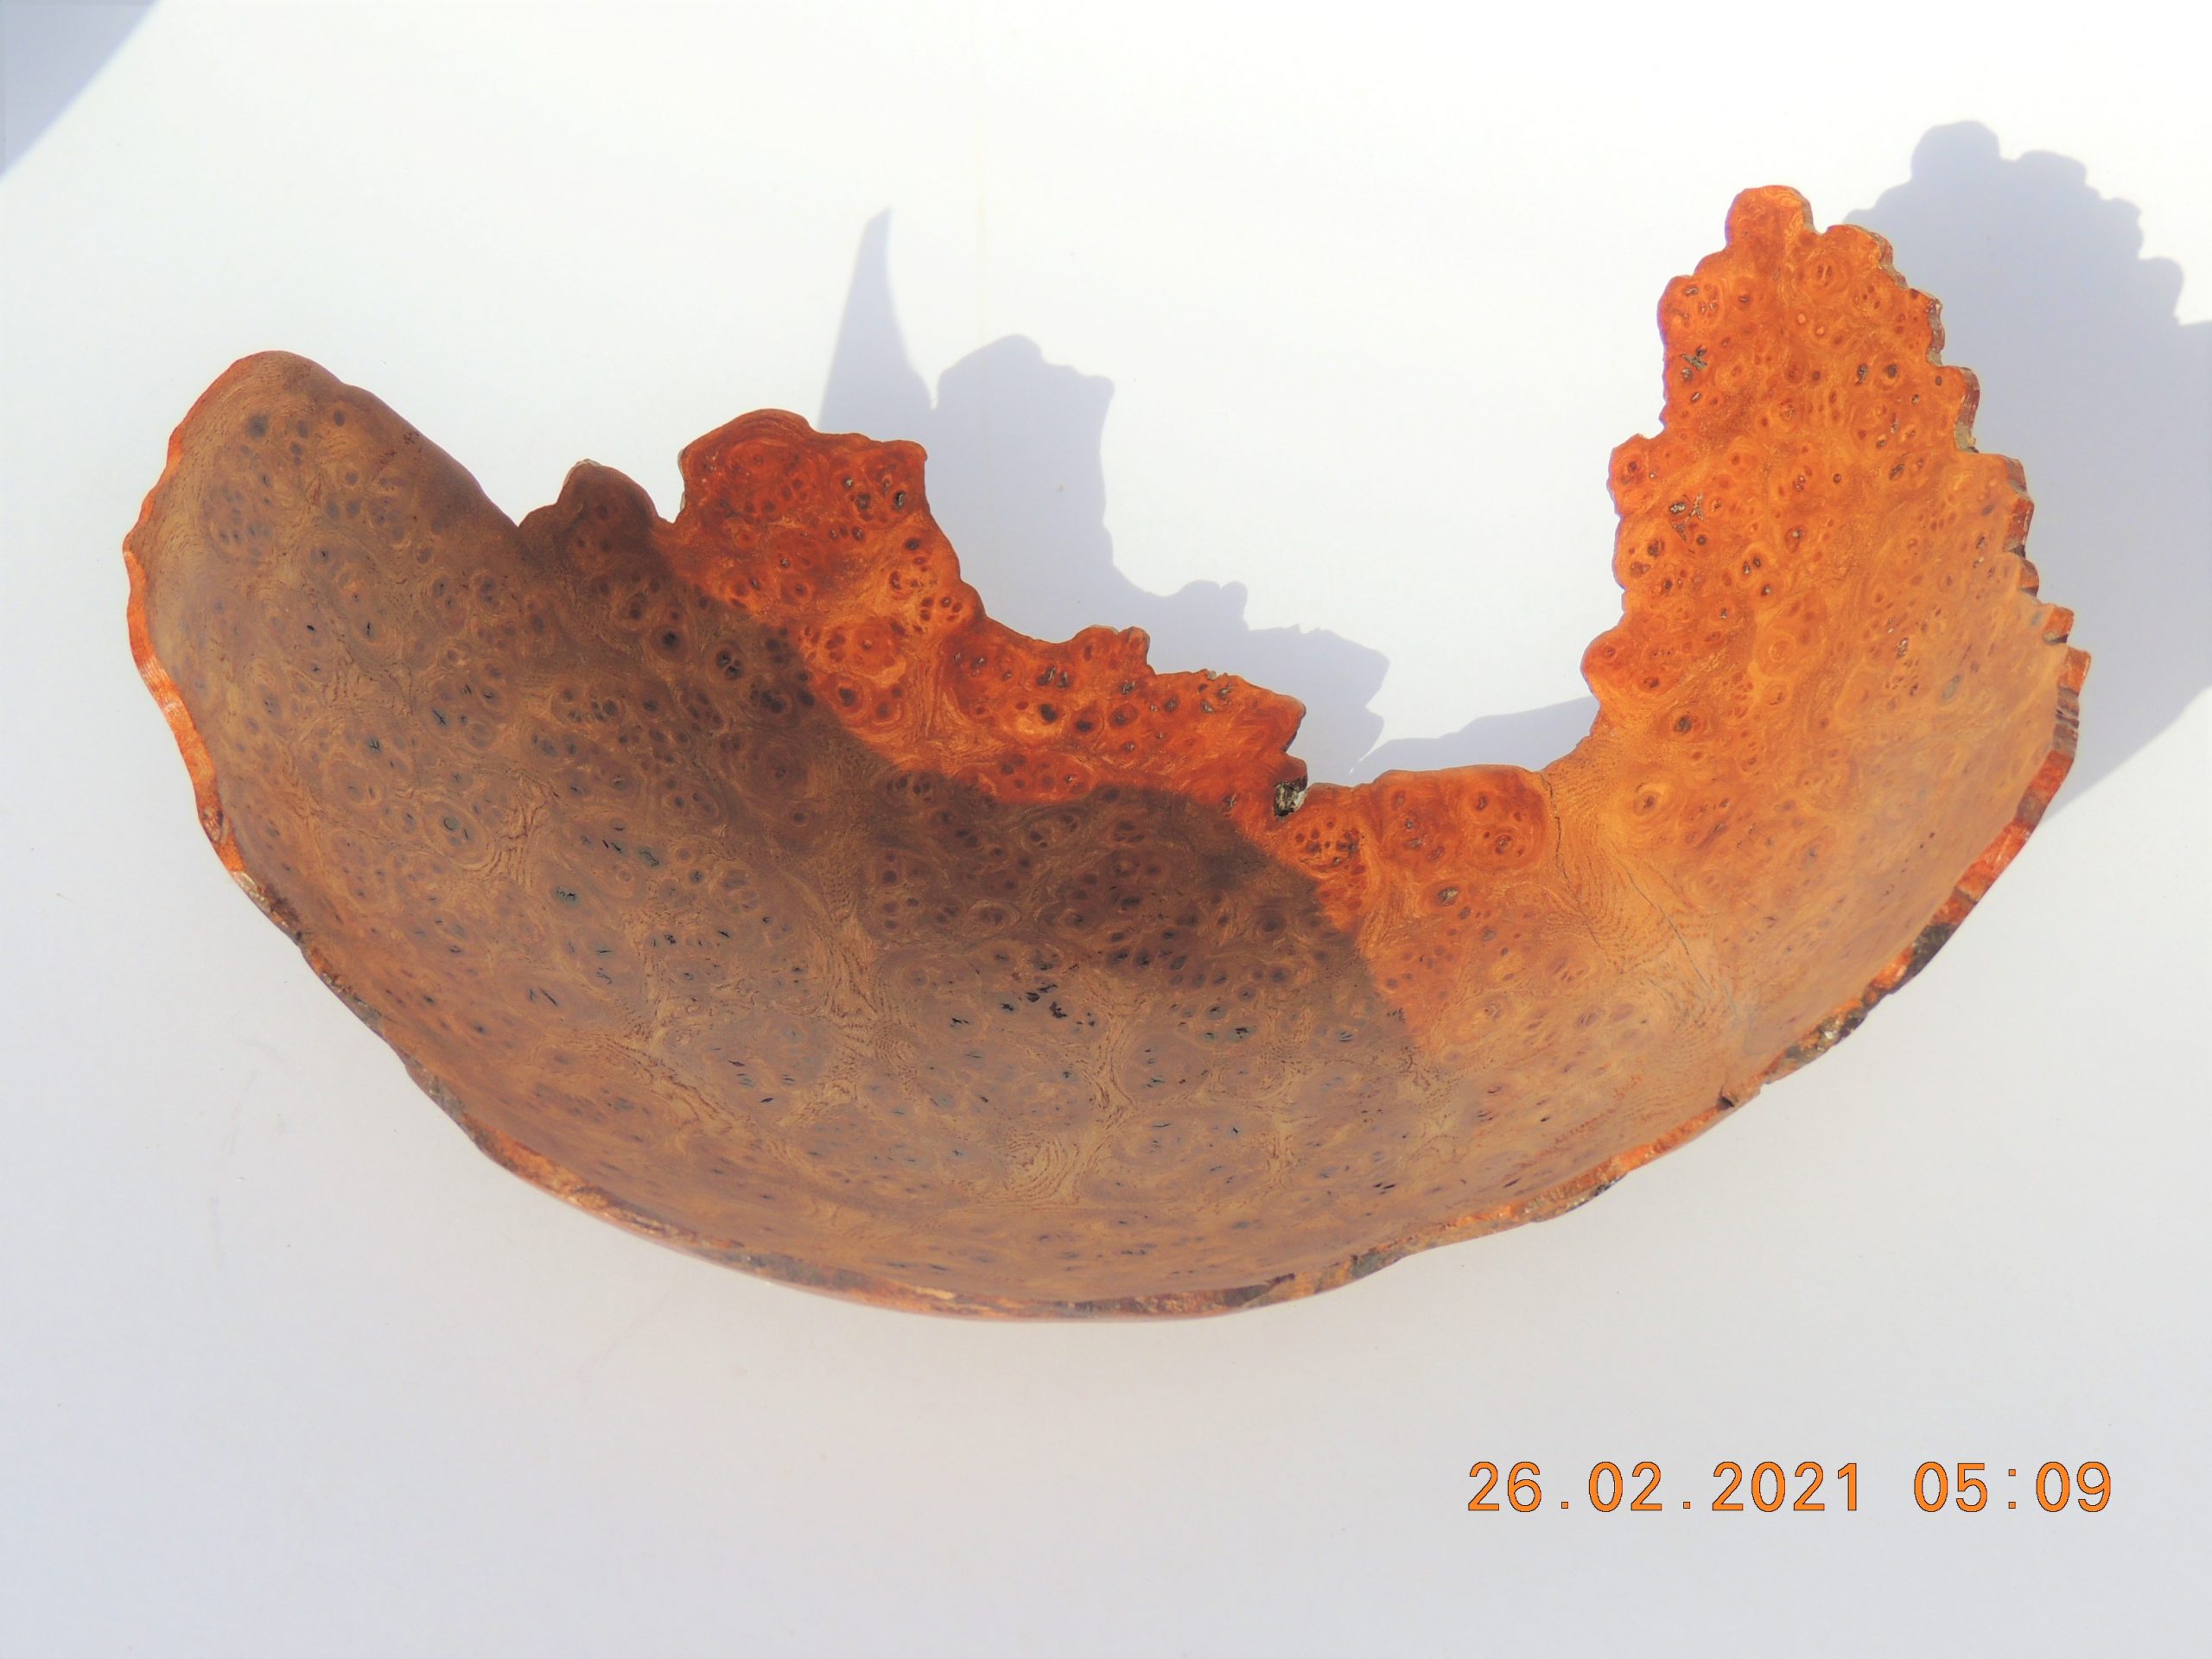
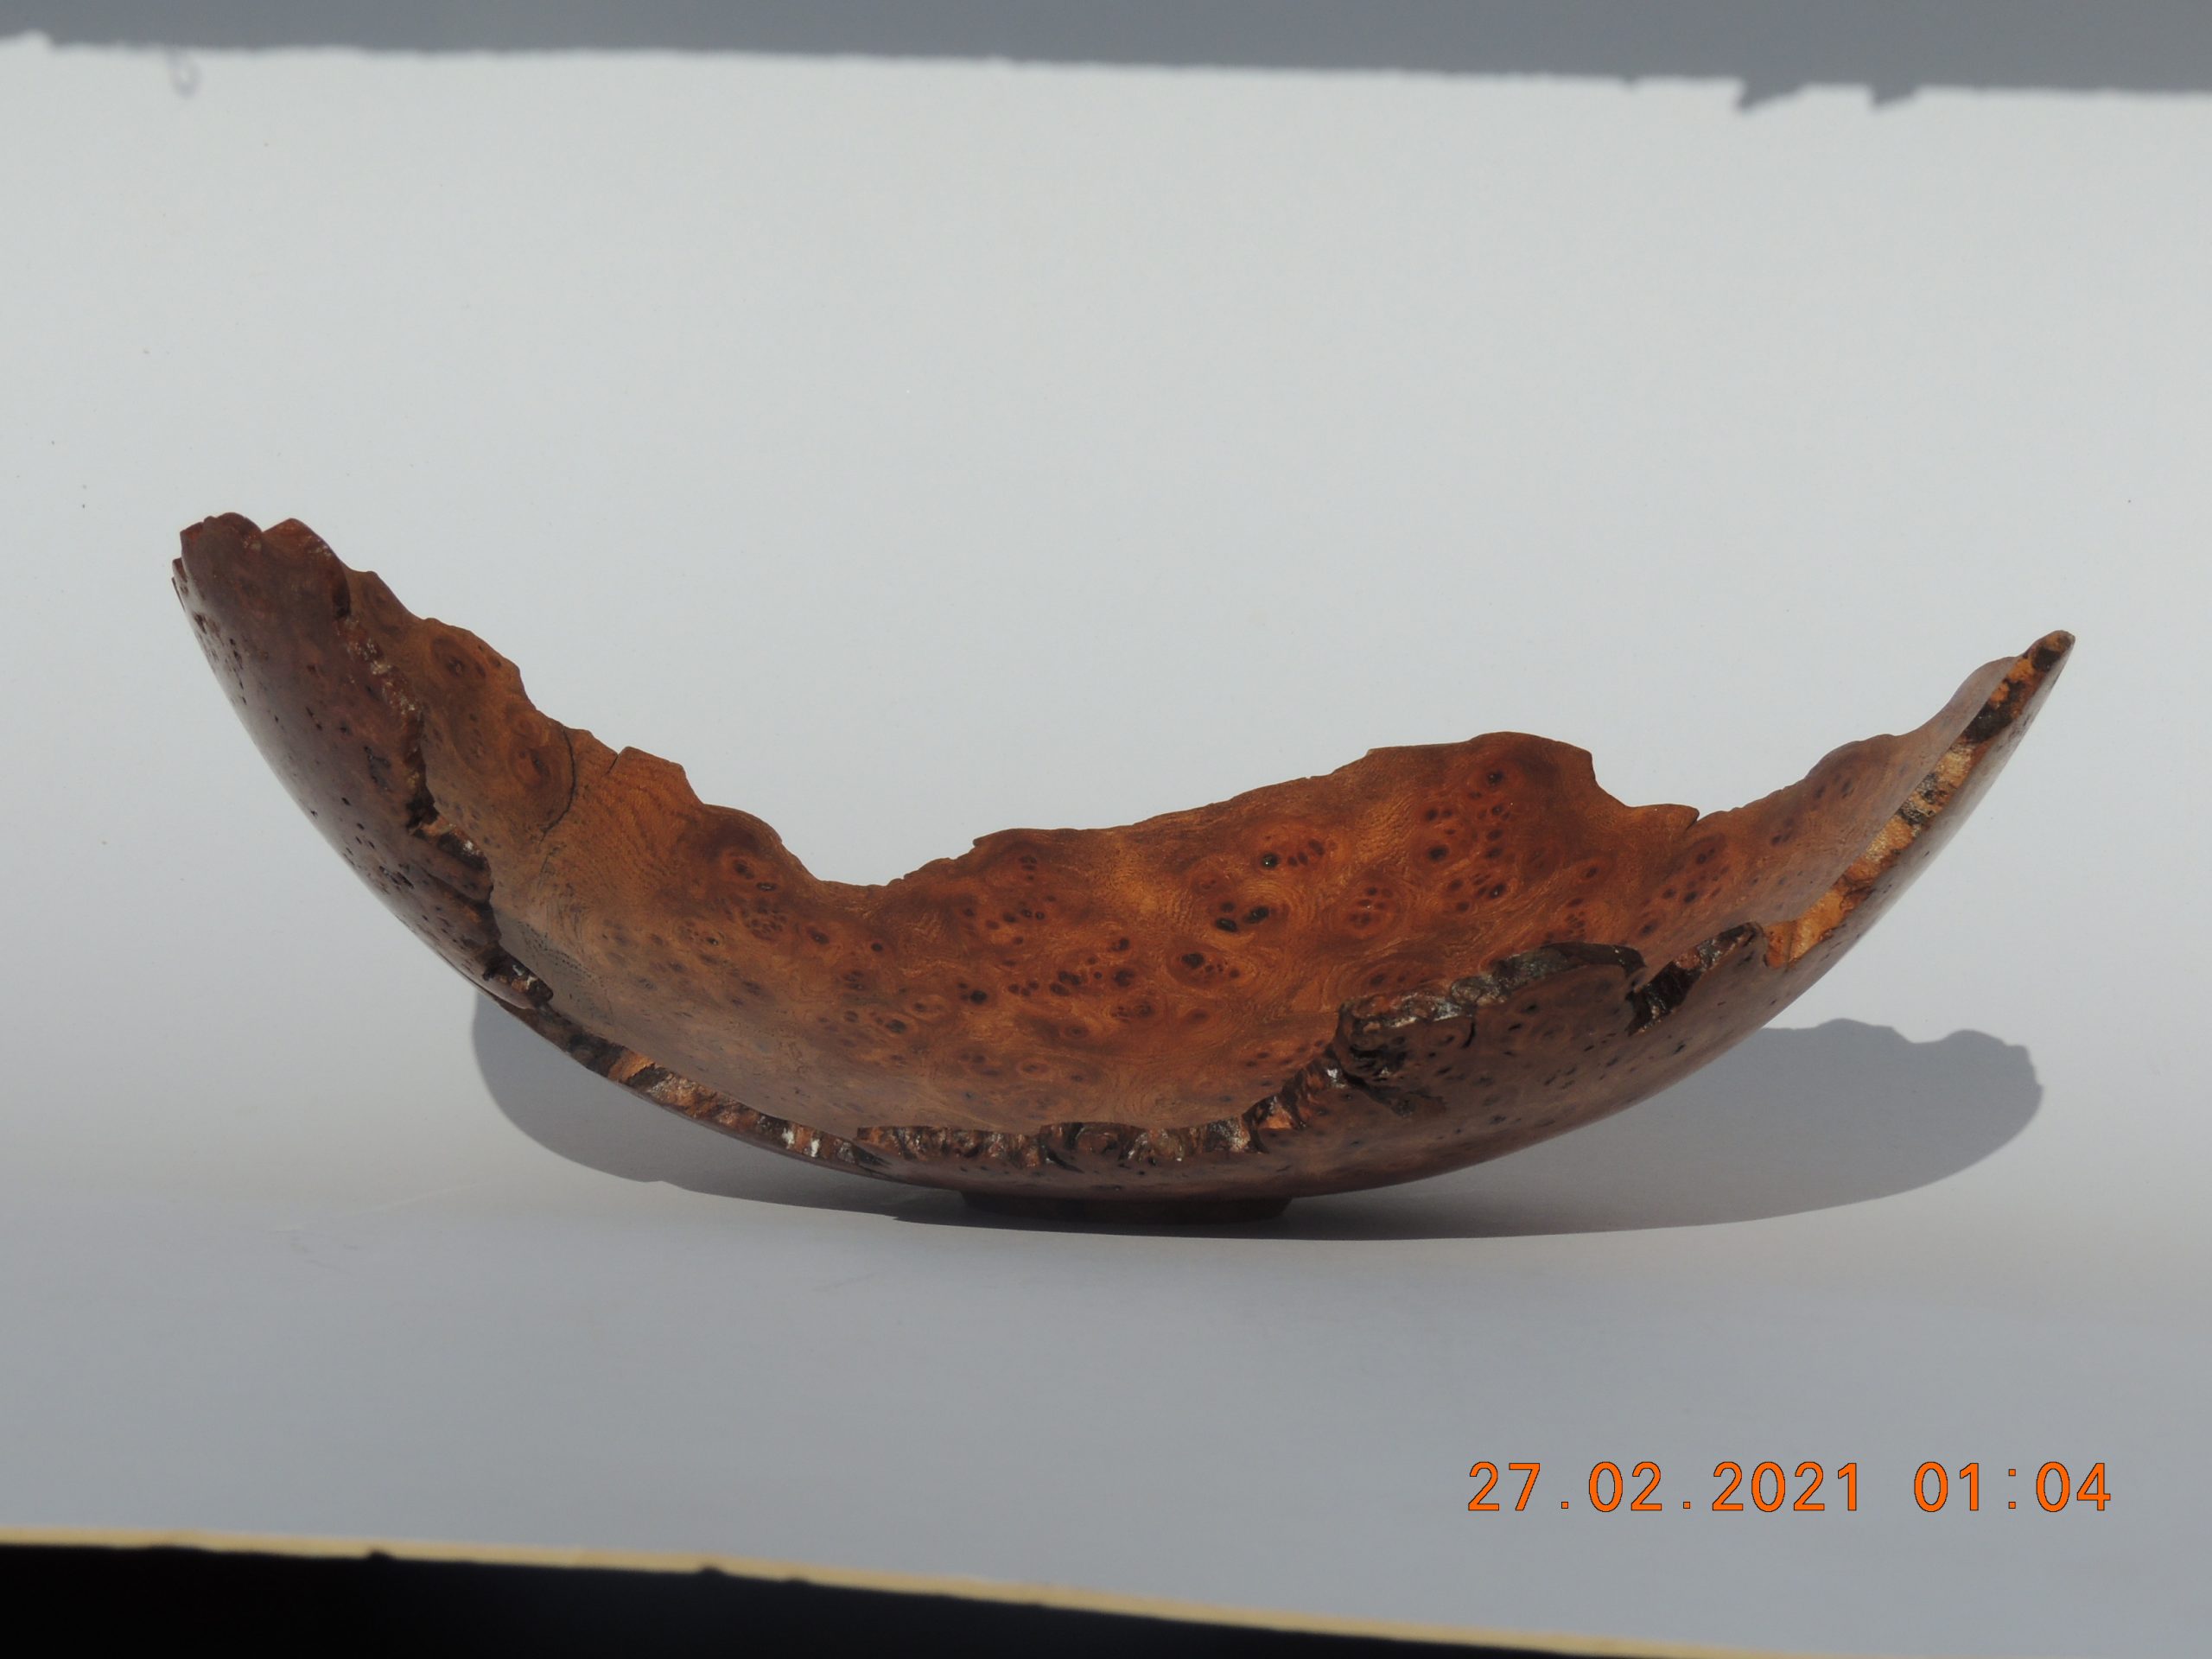
Winner of February Competition
Roger Groom
This Chunk of Scottish Burr Elm was part of a wood swop. I provided enough English Oak to make a spinning wheel and was given this blank in return. It is approximately 10″x8″. It was turned between centres initially to form the spigot and the outside shape. then the inside was hollowed out using a chuck. there was a lot of air turning and one wing needed copious amounts of superglue to keep it in place. The wall thickness is about 4-5mm. It was finished with 3 coats of Rustins Danish Oil leaving a satin sheen. One thing i was very lucky with is that the bowl, if knocked will automatically rebalance on its foot. A big stroke of luck maybe!!